


Introducing R.swift
EnvironmentR.swift is very useful for development with xib, so please install it.
It will be used in many of the recipes on this site.
About R.swift
R.swift is a library that makes resource management easier. By typing resources, there is no need to hardcode strings, and autocomplete functions can be used.
Without R.swift
// Register Cell
collectionView.register(CustomCollectionViewCell.self, forCellWithReuseIdentifier: "cell")

// Reuse Cell
let cell = collectionView.dequeueReusableCell(withReuseIdentifier: "cell", for: indexPath)

// Create ViewController
let viewController = ViewController(nibName: "ViewController", bundle: nil)
Using R.swift
// Register Cell
collectionView.register(R.nib.customCollectionViewCell)

// Reuse Cell
let cell = collectionView.dequeueReusableCell(withReuseIdentifier: R.reuseIdentifier.customCollectionViewCell, for: indexPath)!

// Create ViewController
let viewController = ViewController(nib: R.nib.viewController)
Install with Mint
In this article, I will show you how to install R.swift using Mint. For other methods, please check README.md.
Mint is package manager that installs and runs Swift command line tool packages.
Installing Mint
// Install Mint
$ brew install mint
// Check Version
$ mint version-
Installing
Create aMintfilein the root of your project.cd ProjectName touch Mintfile. ├─ ProjectName.xcodeproj ├─ ProjectName └─ MintfileWrite the following in your
Mintfile.mac-cain13/R.swift // With version specified mac-cain13/R.swift@v5.3.1Do a
mint bootstrapwhere theMintfileis located.mint bootstrap -
Add a Run Script
Open your project in Xcode, open
TARGETS>BuidPhases, and selectNew Run Script Phasefrom the + button.(Fregure 1)
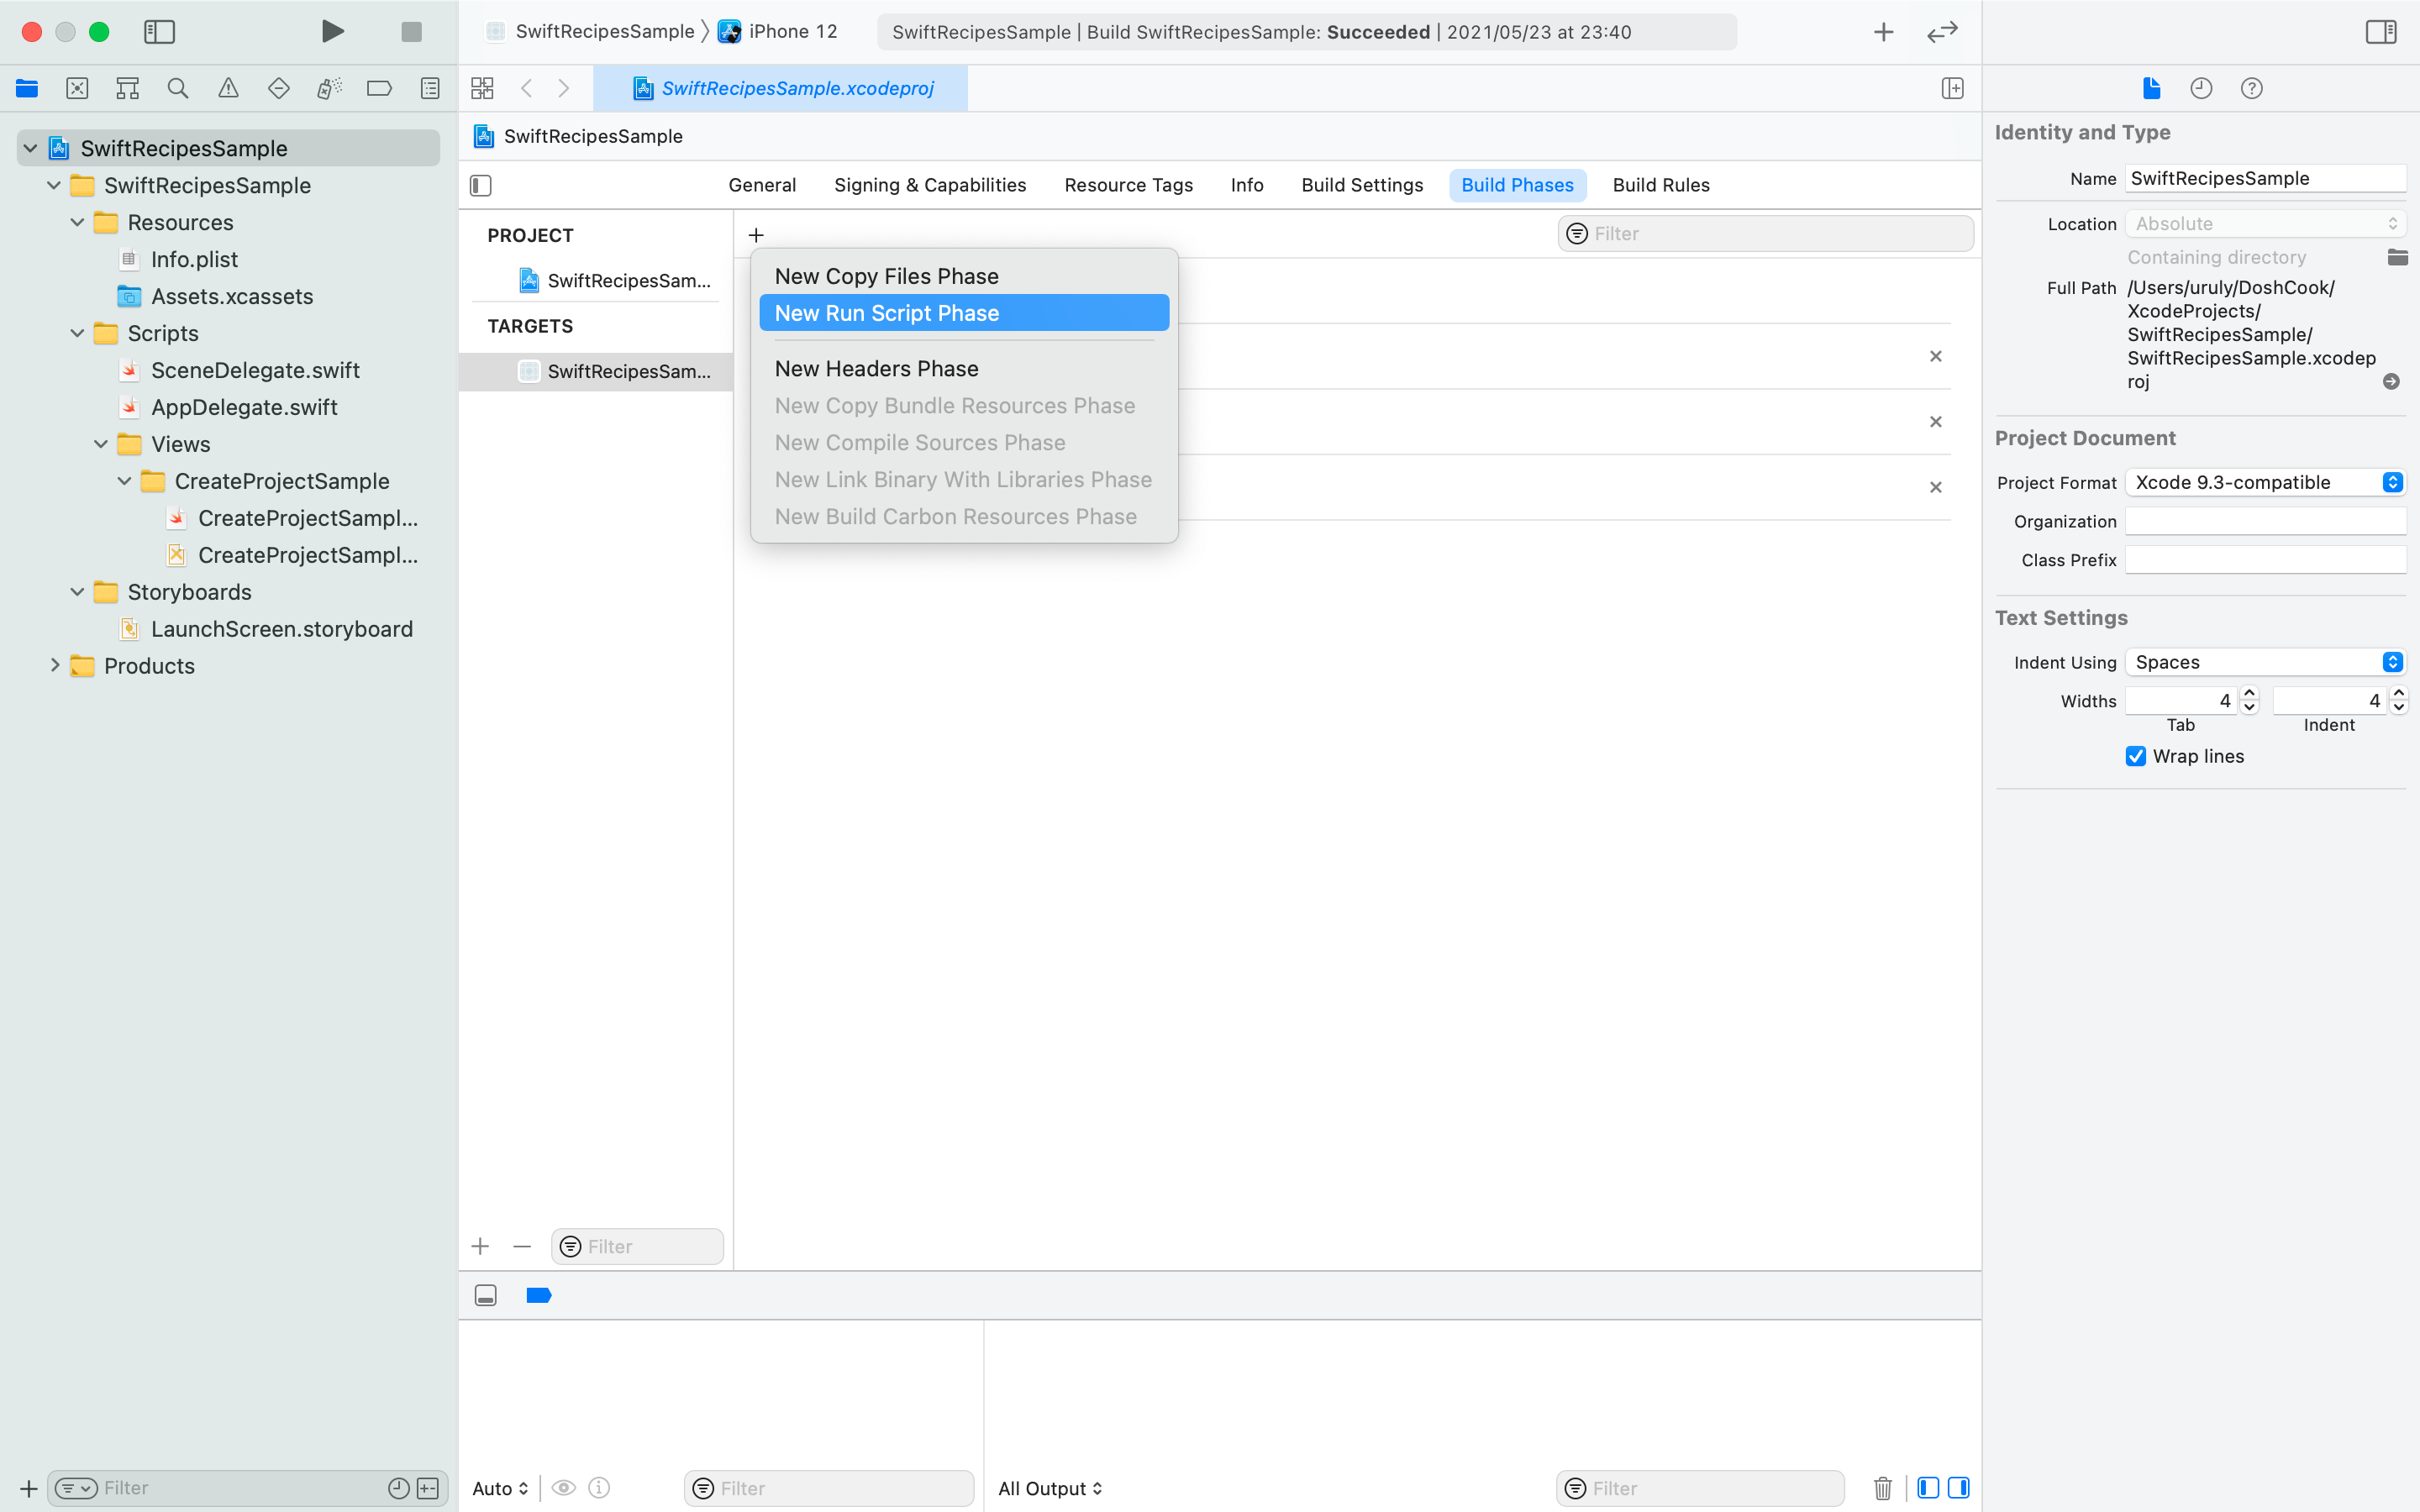
Figure 1Add the following Script.(Figure 2)
if mint list | grep -q 'R.swift'; then
mint run R.swift rswift generate "$SRCROOT/ProjectName/Scripts/R.generated.swift"
else
echo "error: R.swift not installed; run 'mint bootstrap' to install"
return -1
fi
Input Files$TEMP_DIR/rswift-lastrunOutput Files$SRCROOT/ProjectName/Scripts/R.generated.swiftAdd
Input FilesandOutput Filesrespectively. (Figure 2)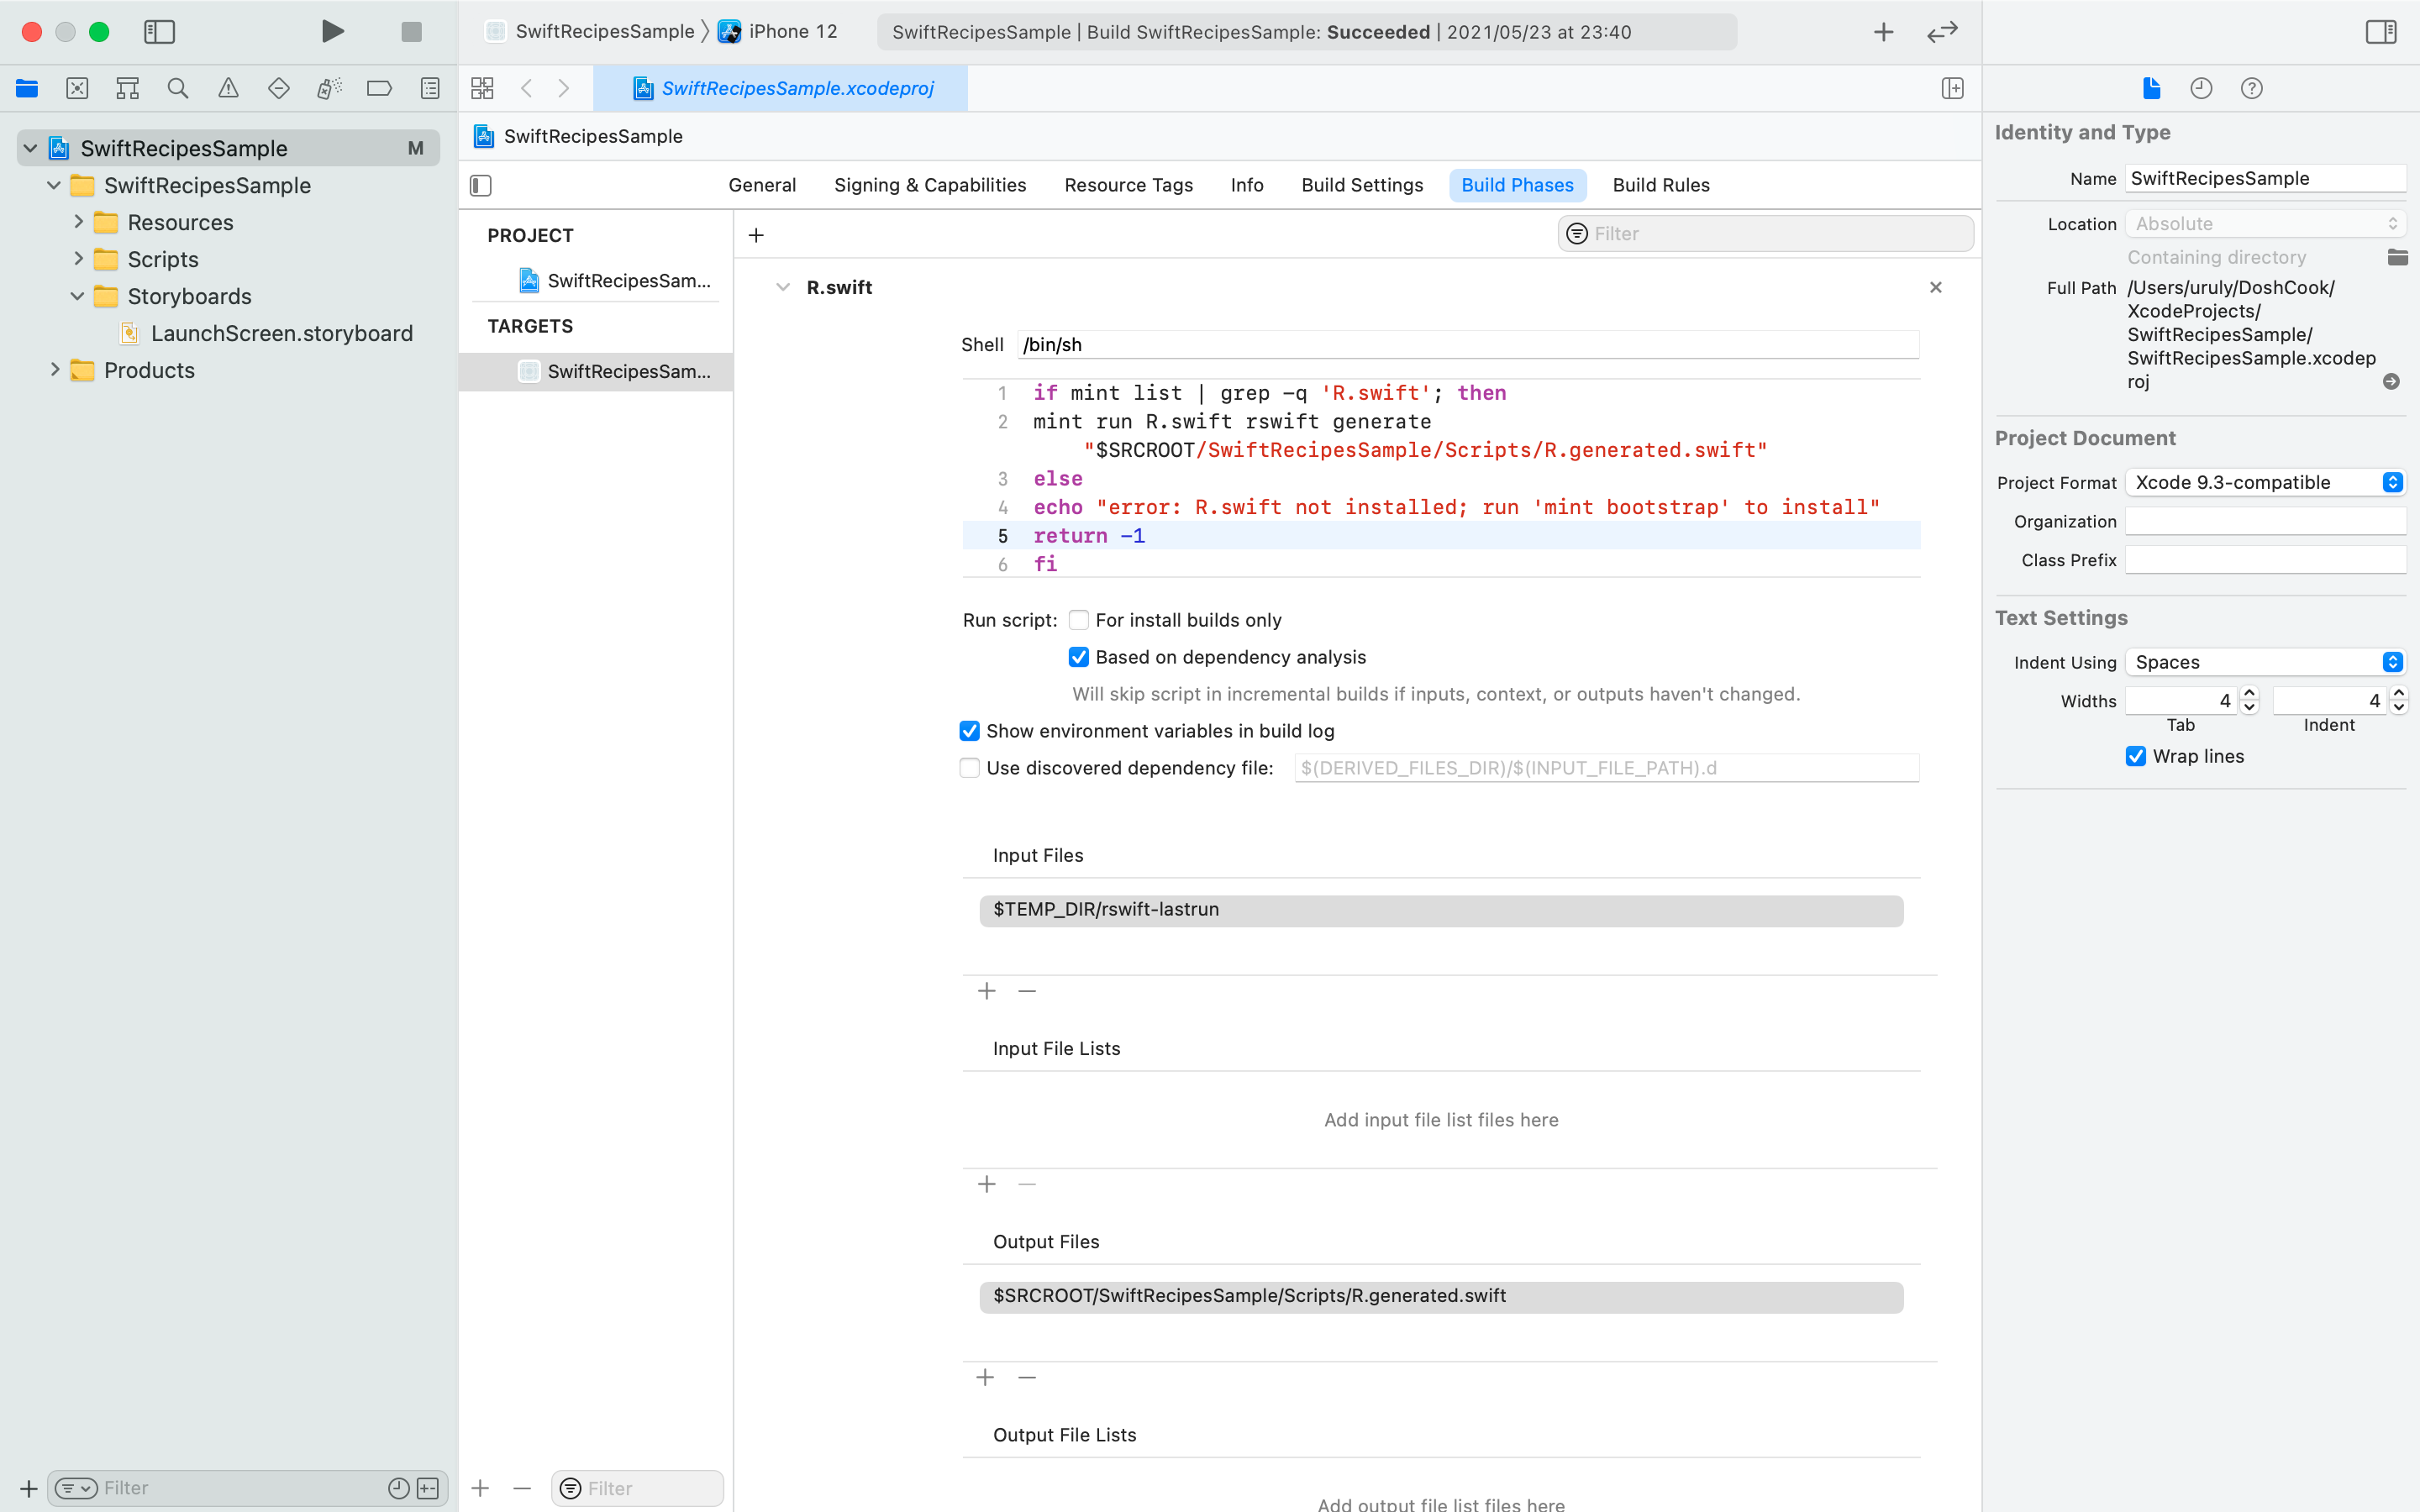
Figure 2Finally, bring it in front of
Compile Sources(Figure 3) and build it.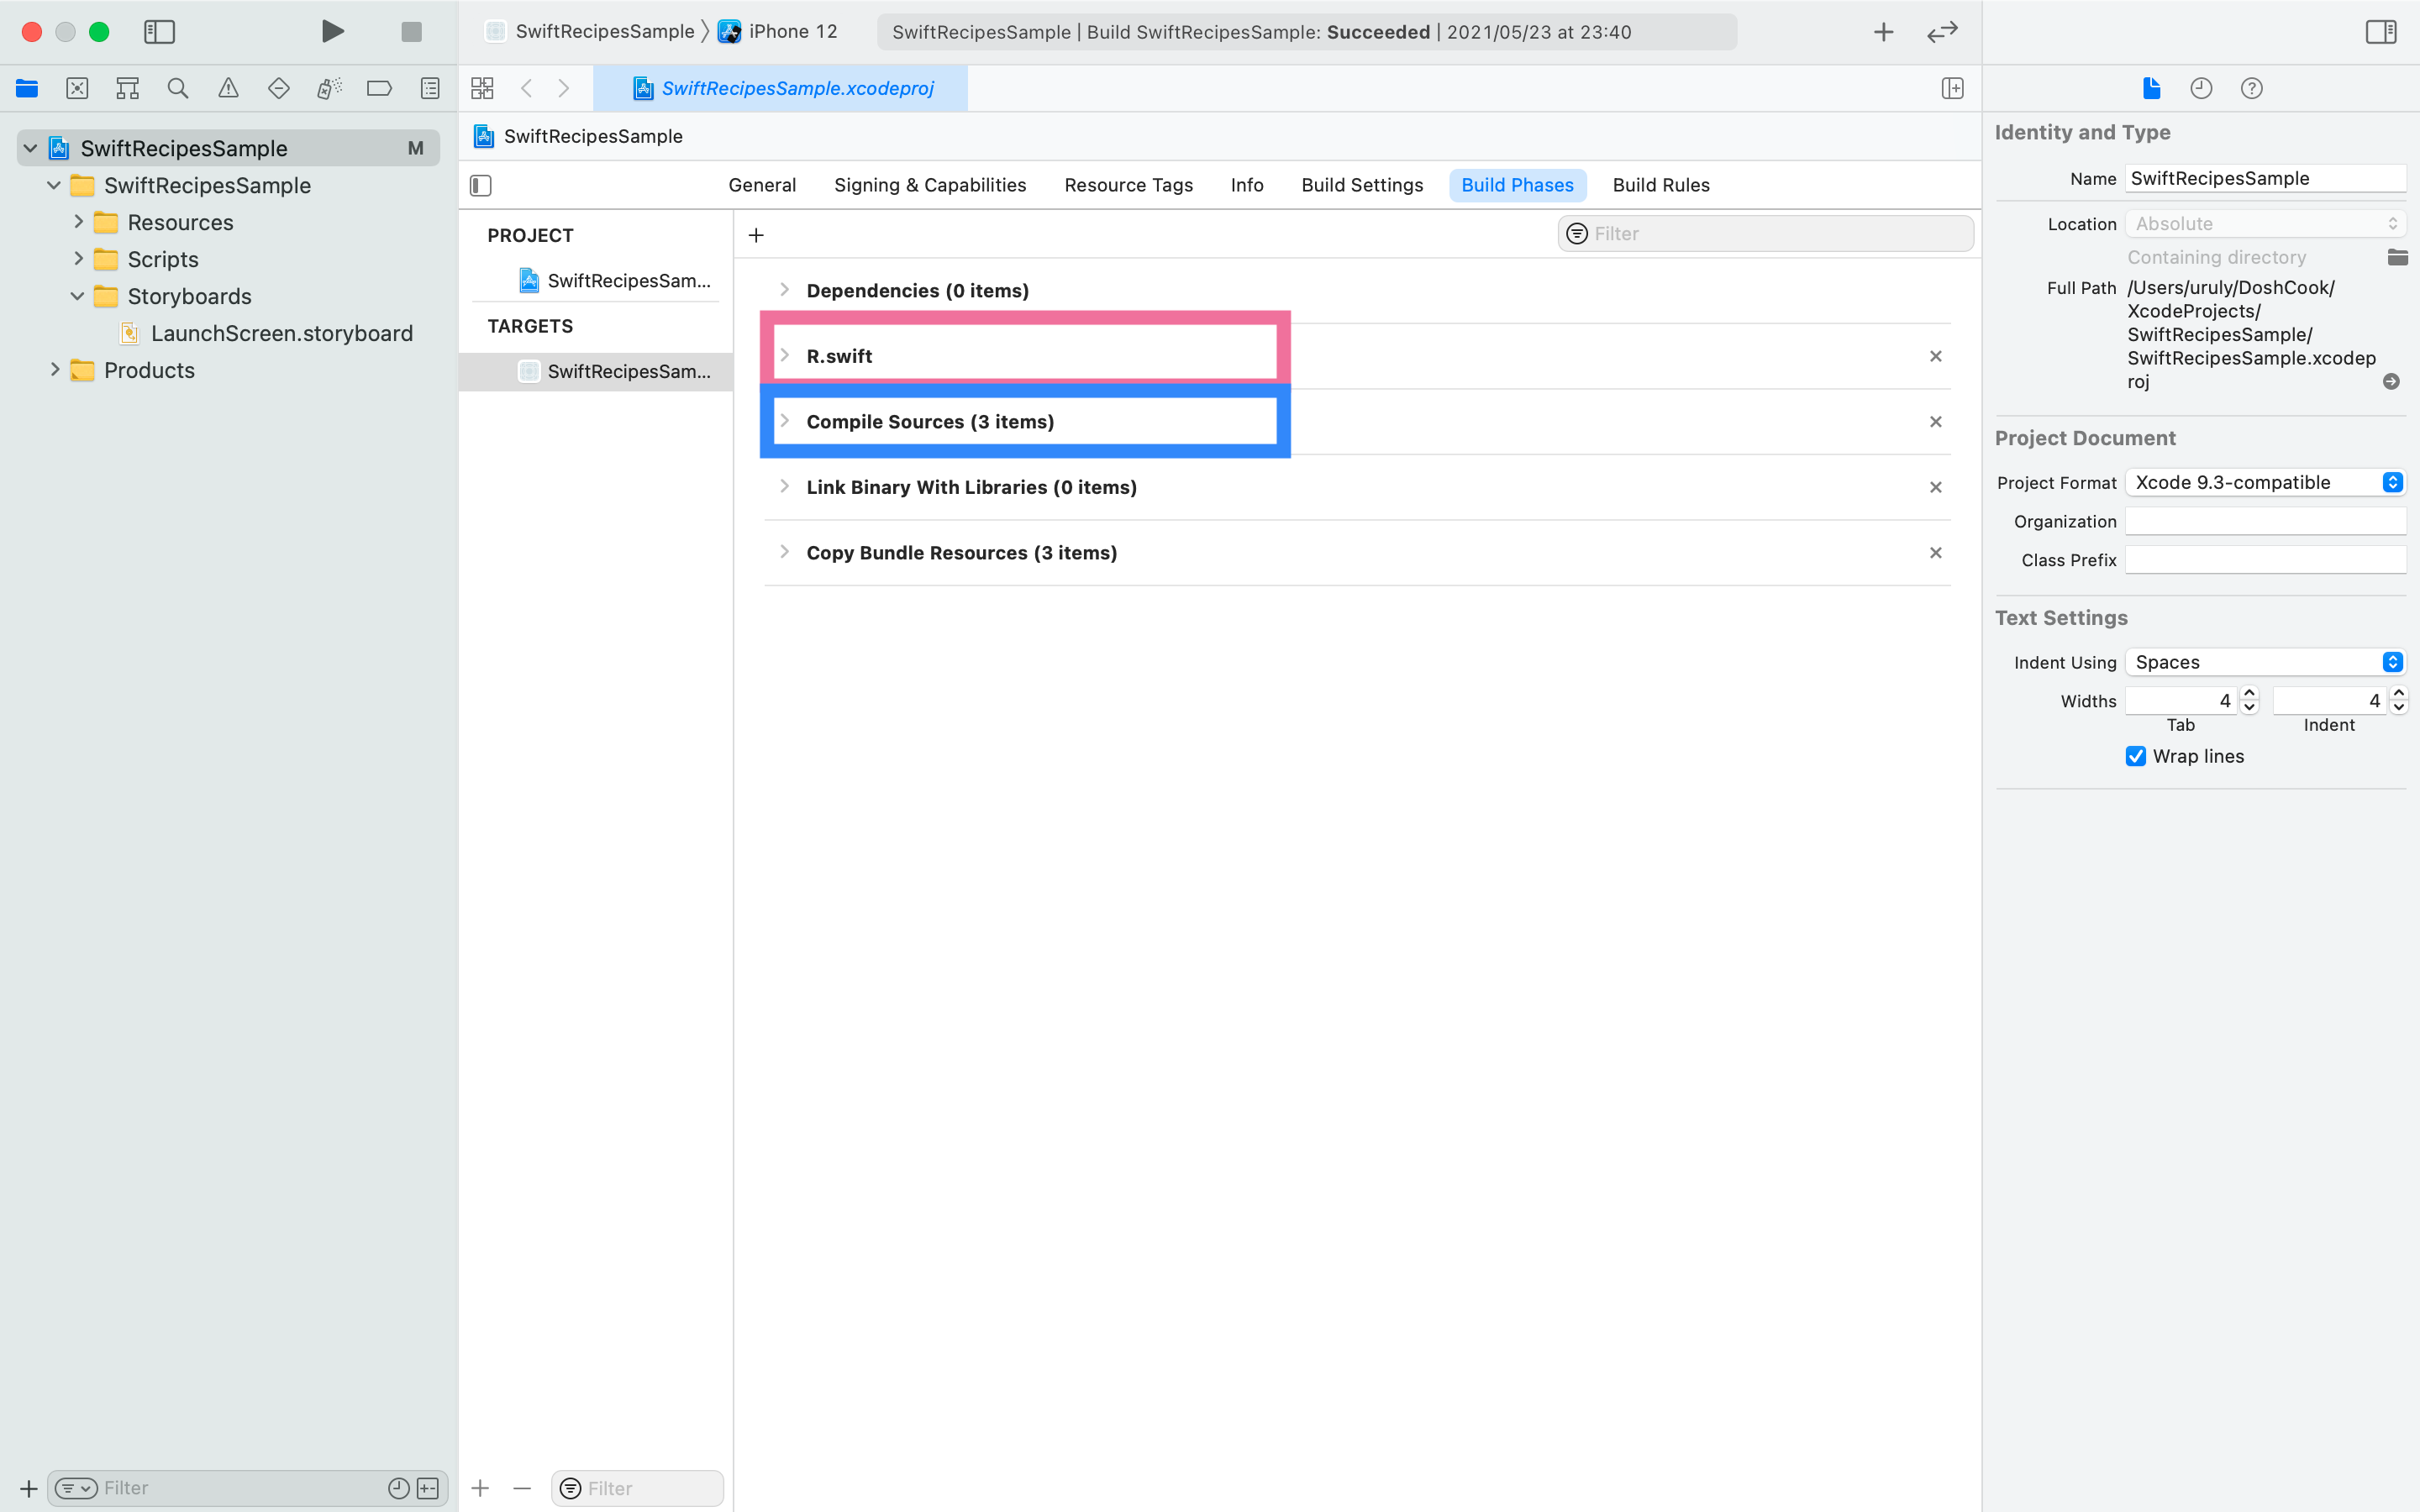
Figure 3Be sure to move the scripts after Compile Sources, as placing them there may cause errors.
-
Add R.generated.swift to the project
After building the file as described in step 2,
R.generated.swiftwill be generated in the location specified inOutput Files, so add it to Xcode. (Figure 4)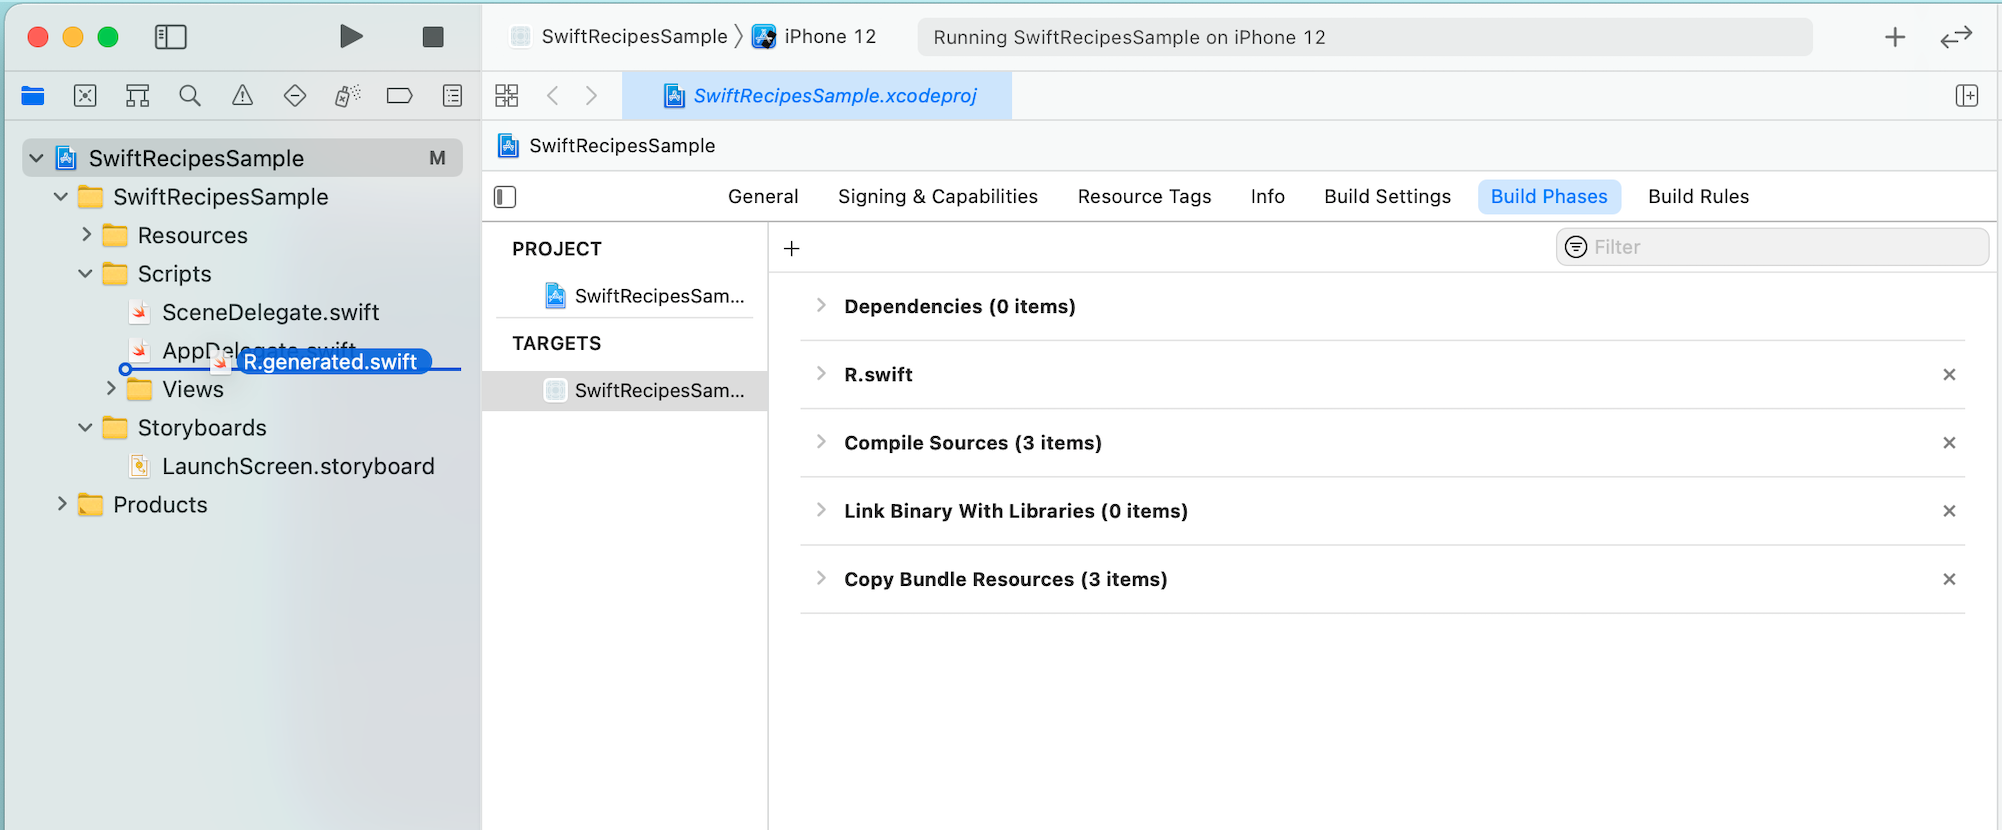
Figure 4When adding, uncheck
Copy If Needed. (Figure 5)
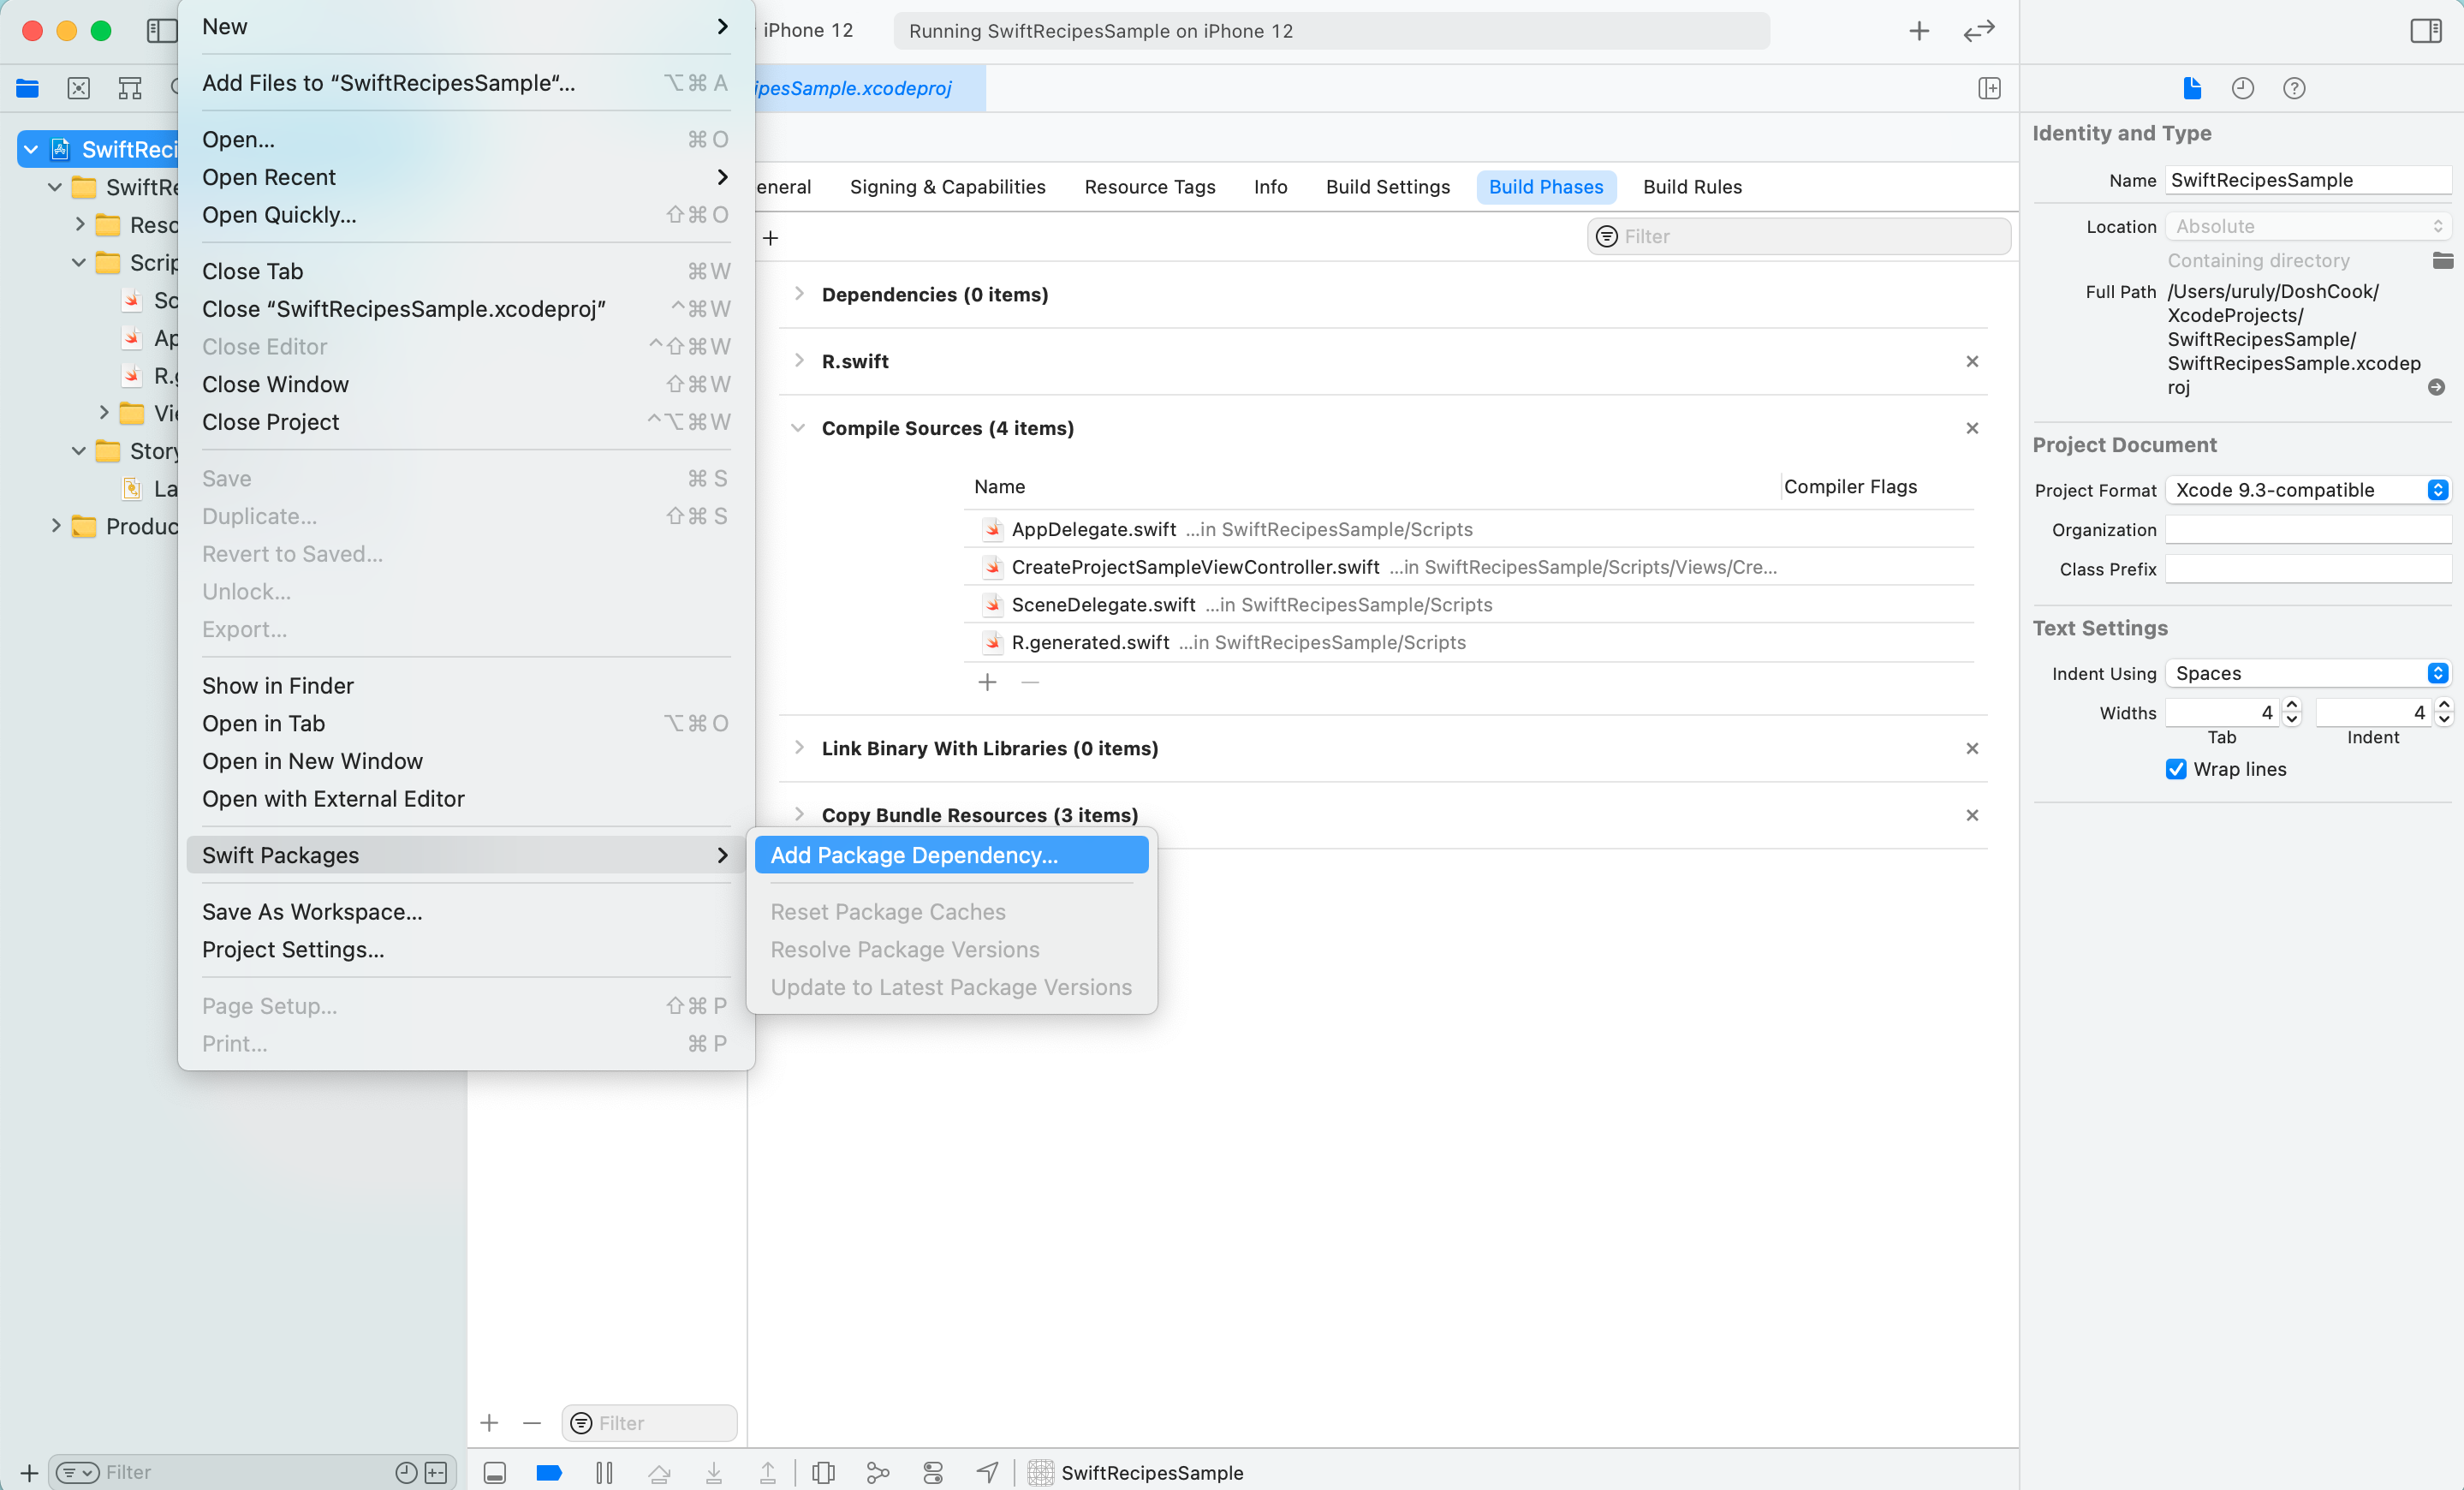
Figure 6Enter
https://github.com/mac-cain13/R.swift.Libraryin theEnter package repositry URLfield. (Figure 7)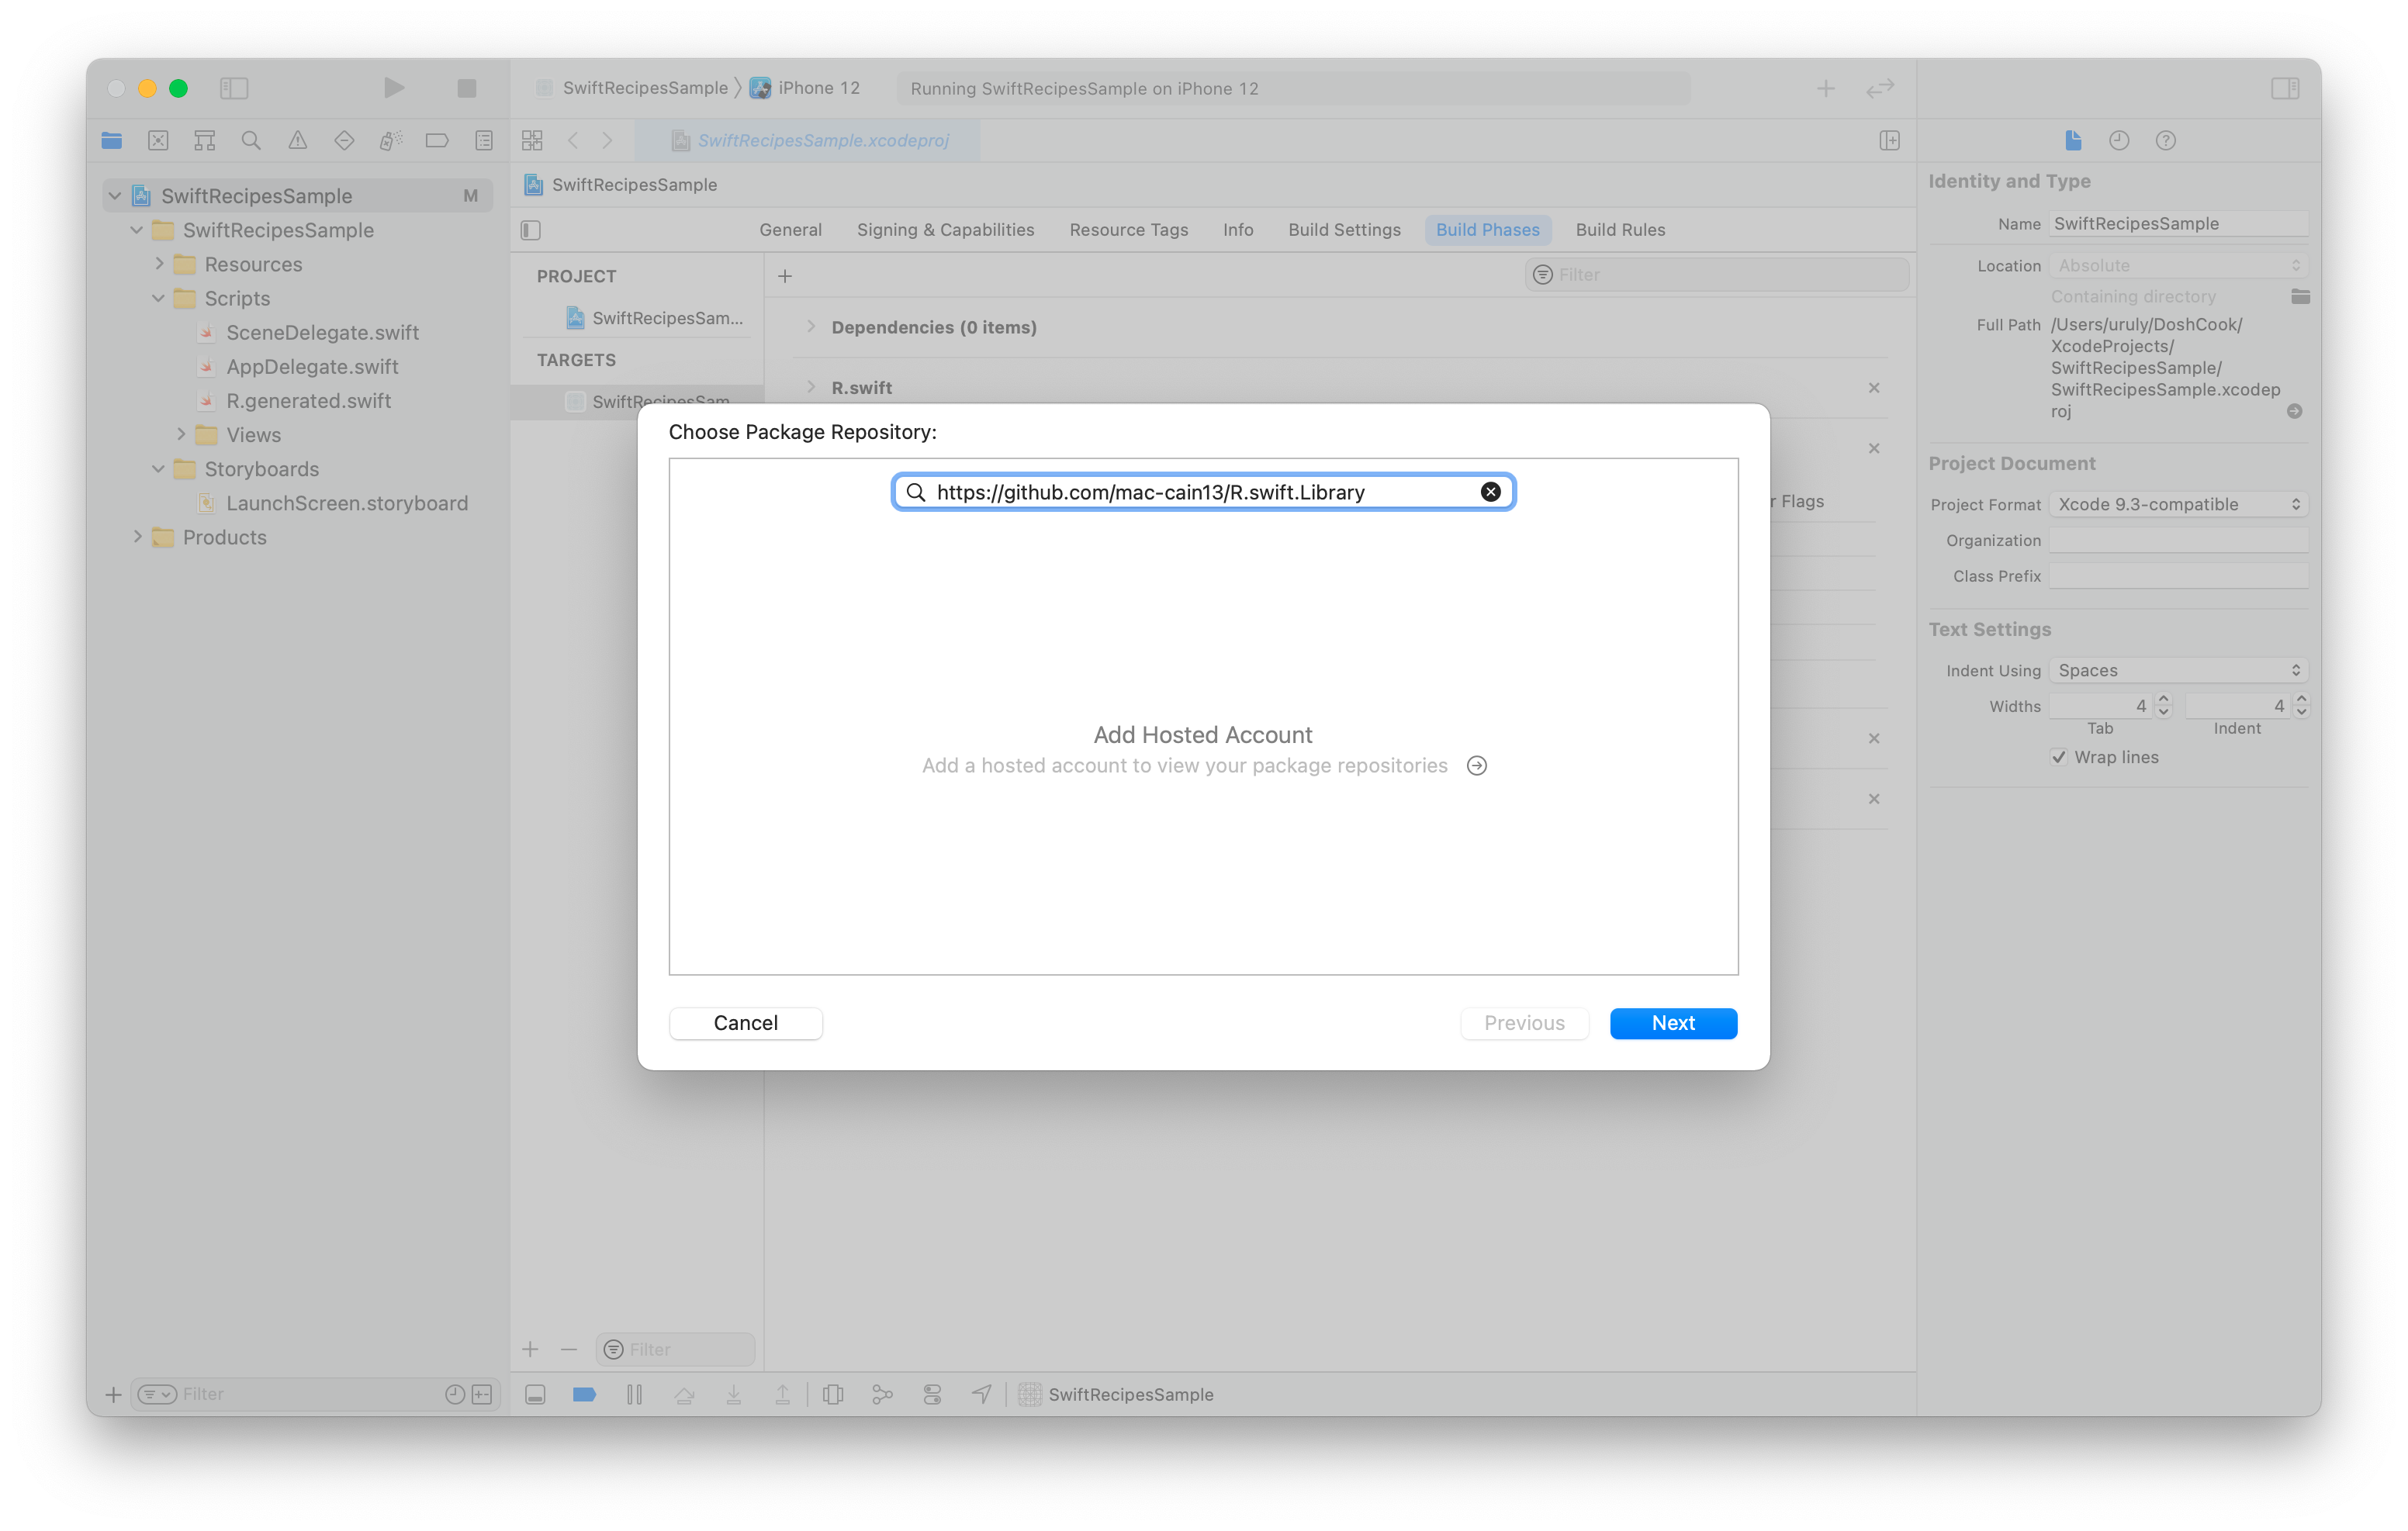
Figure 7For
Version Rules, I specifiedUpdate Next Minor. (Figure 8)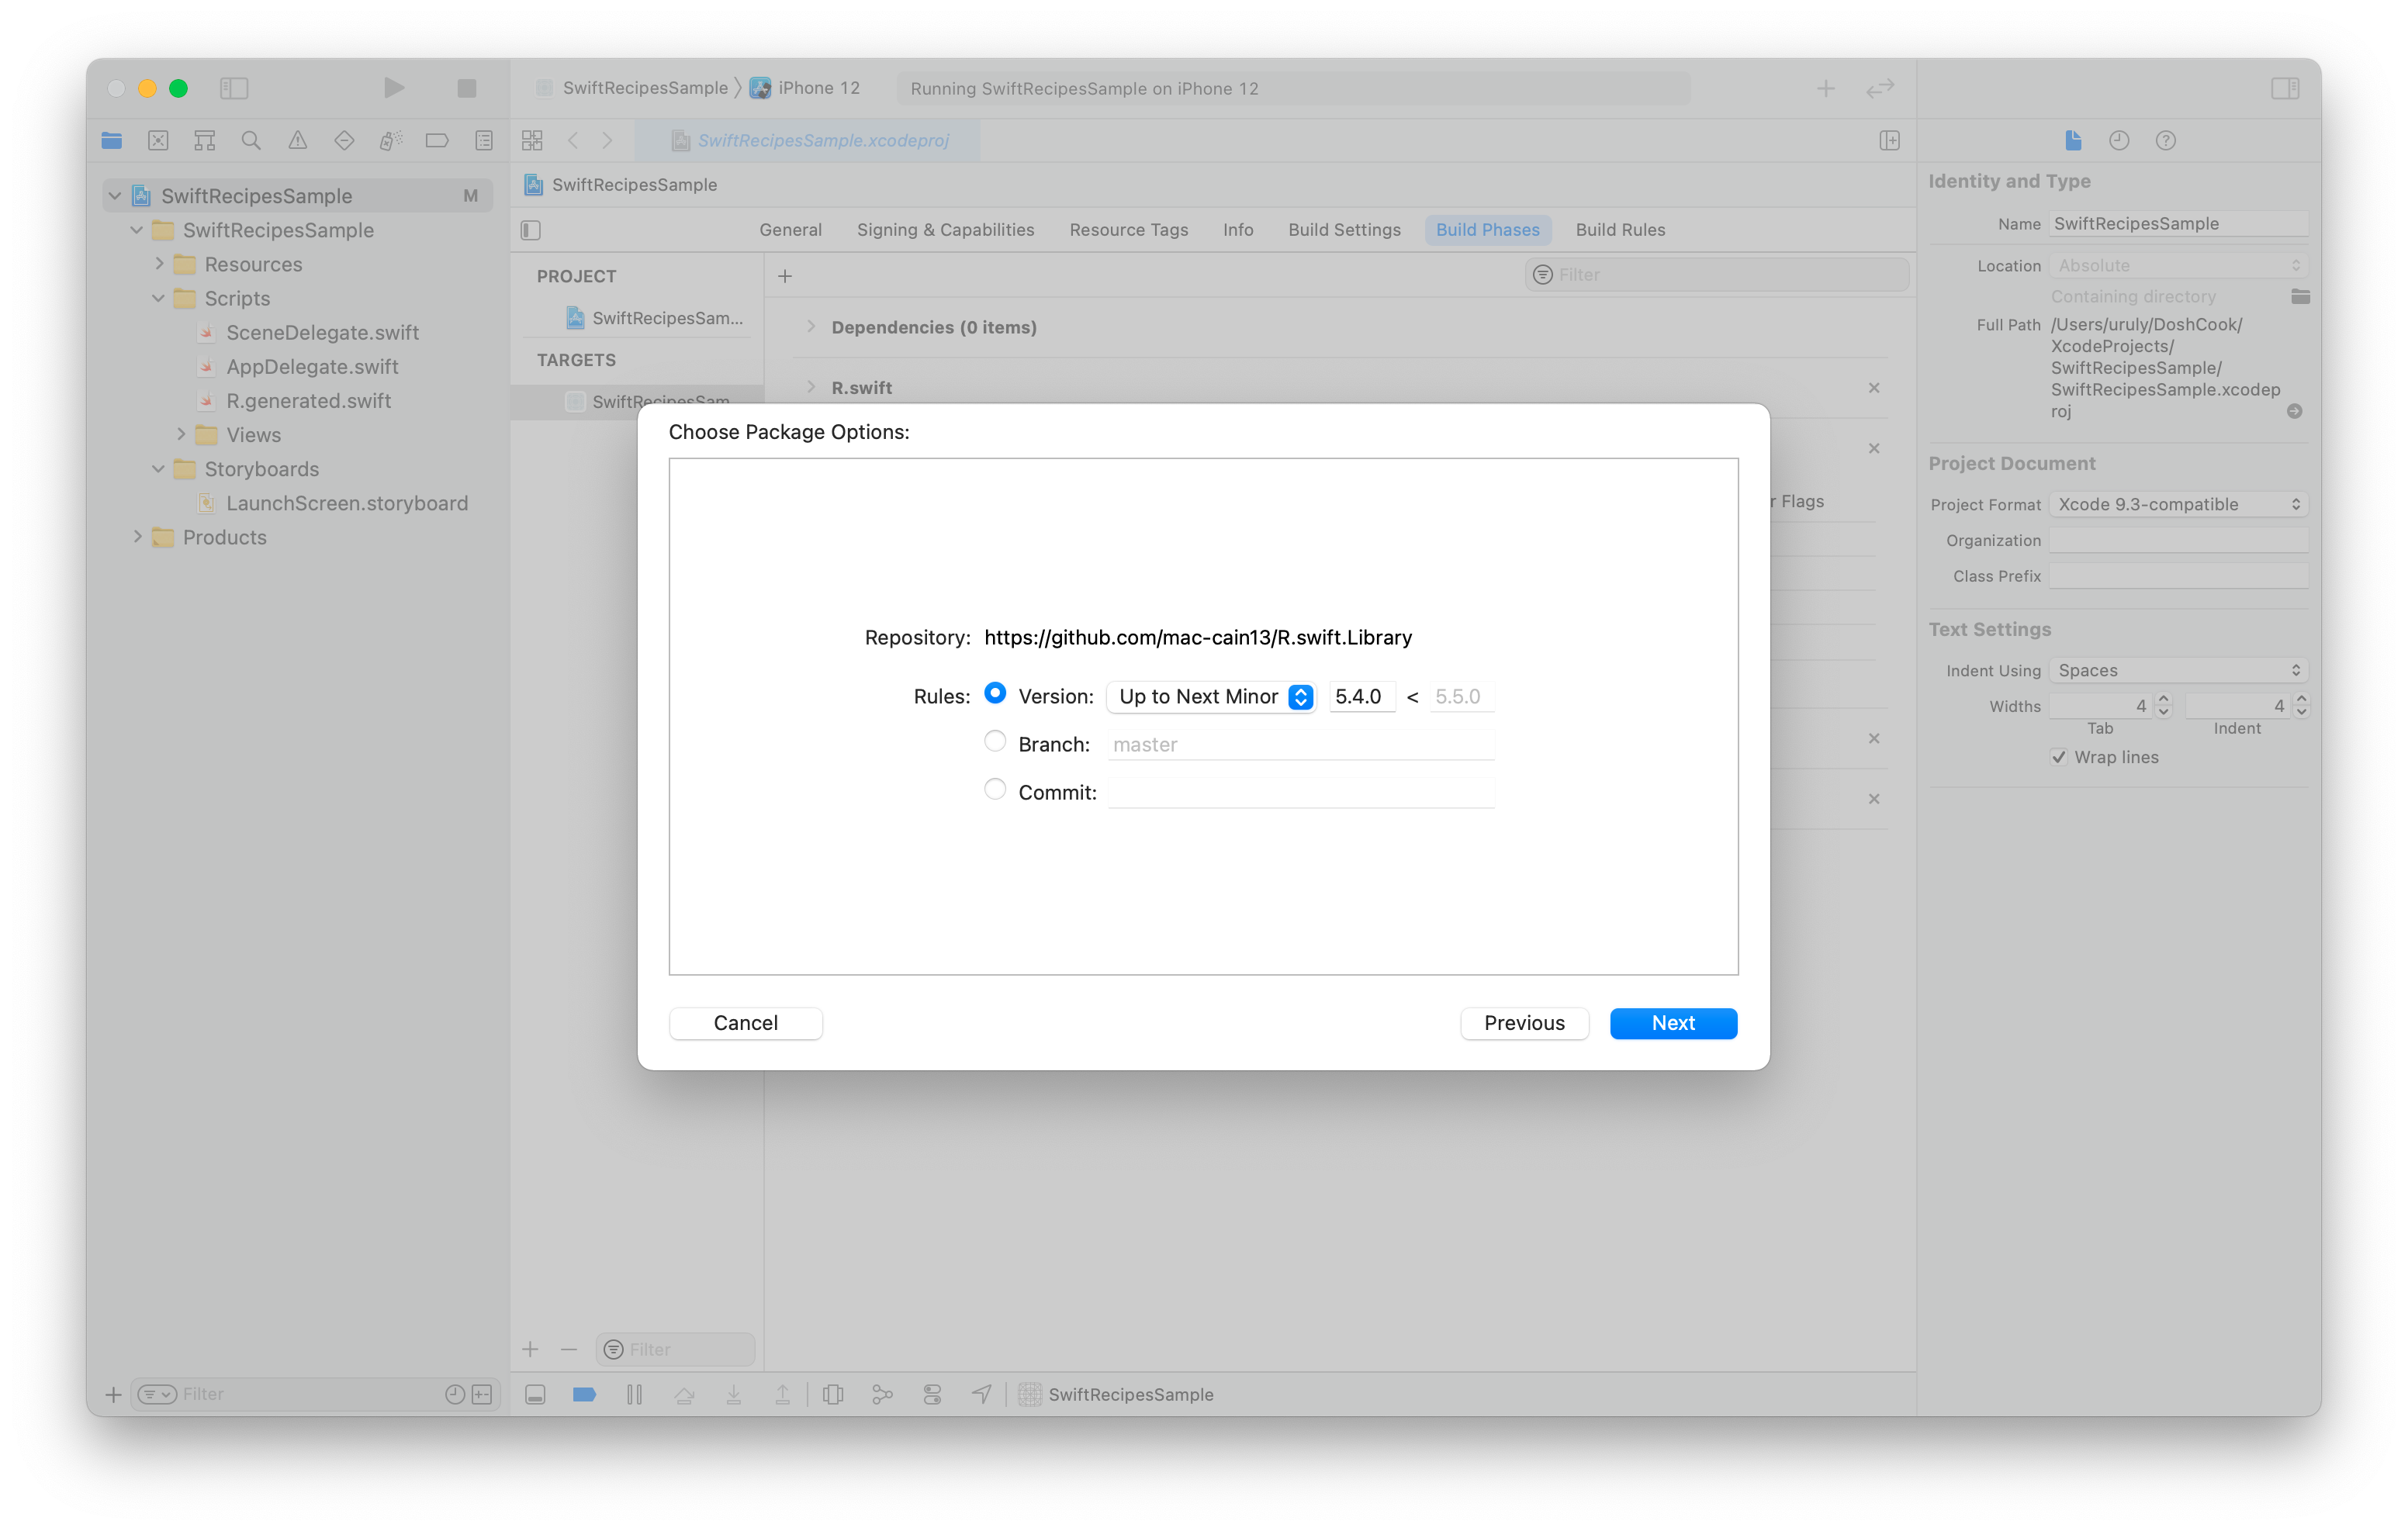
Figure 8Select only
R.swiftto complete. (Figure 9)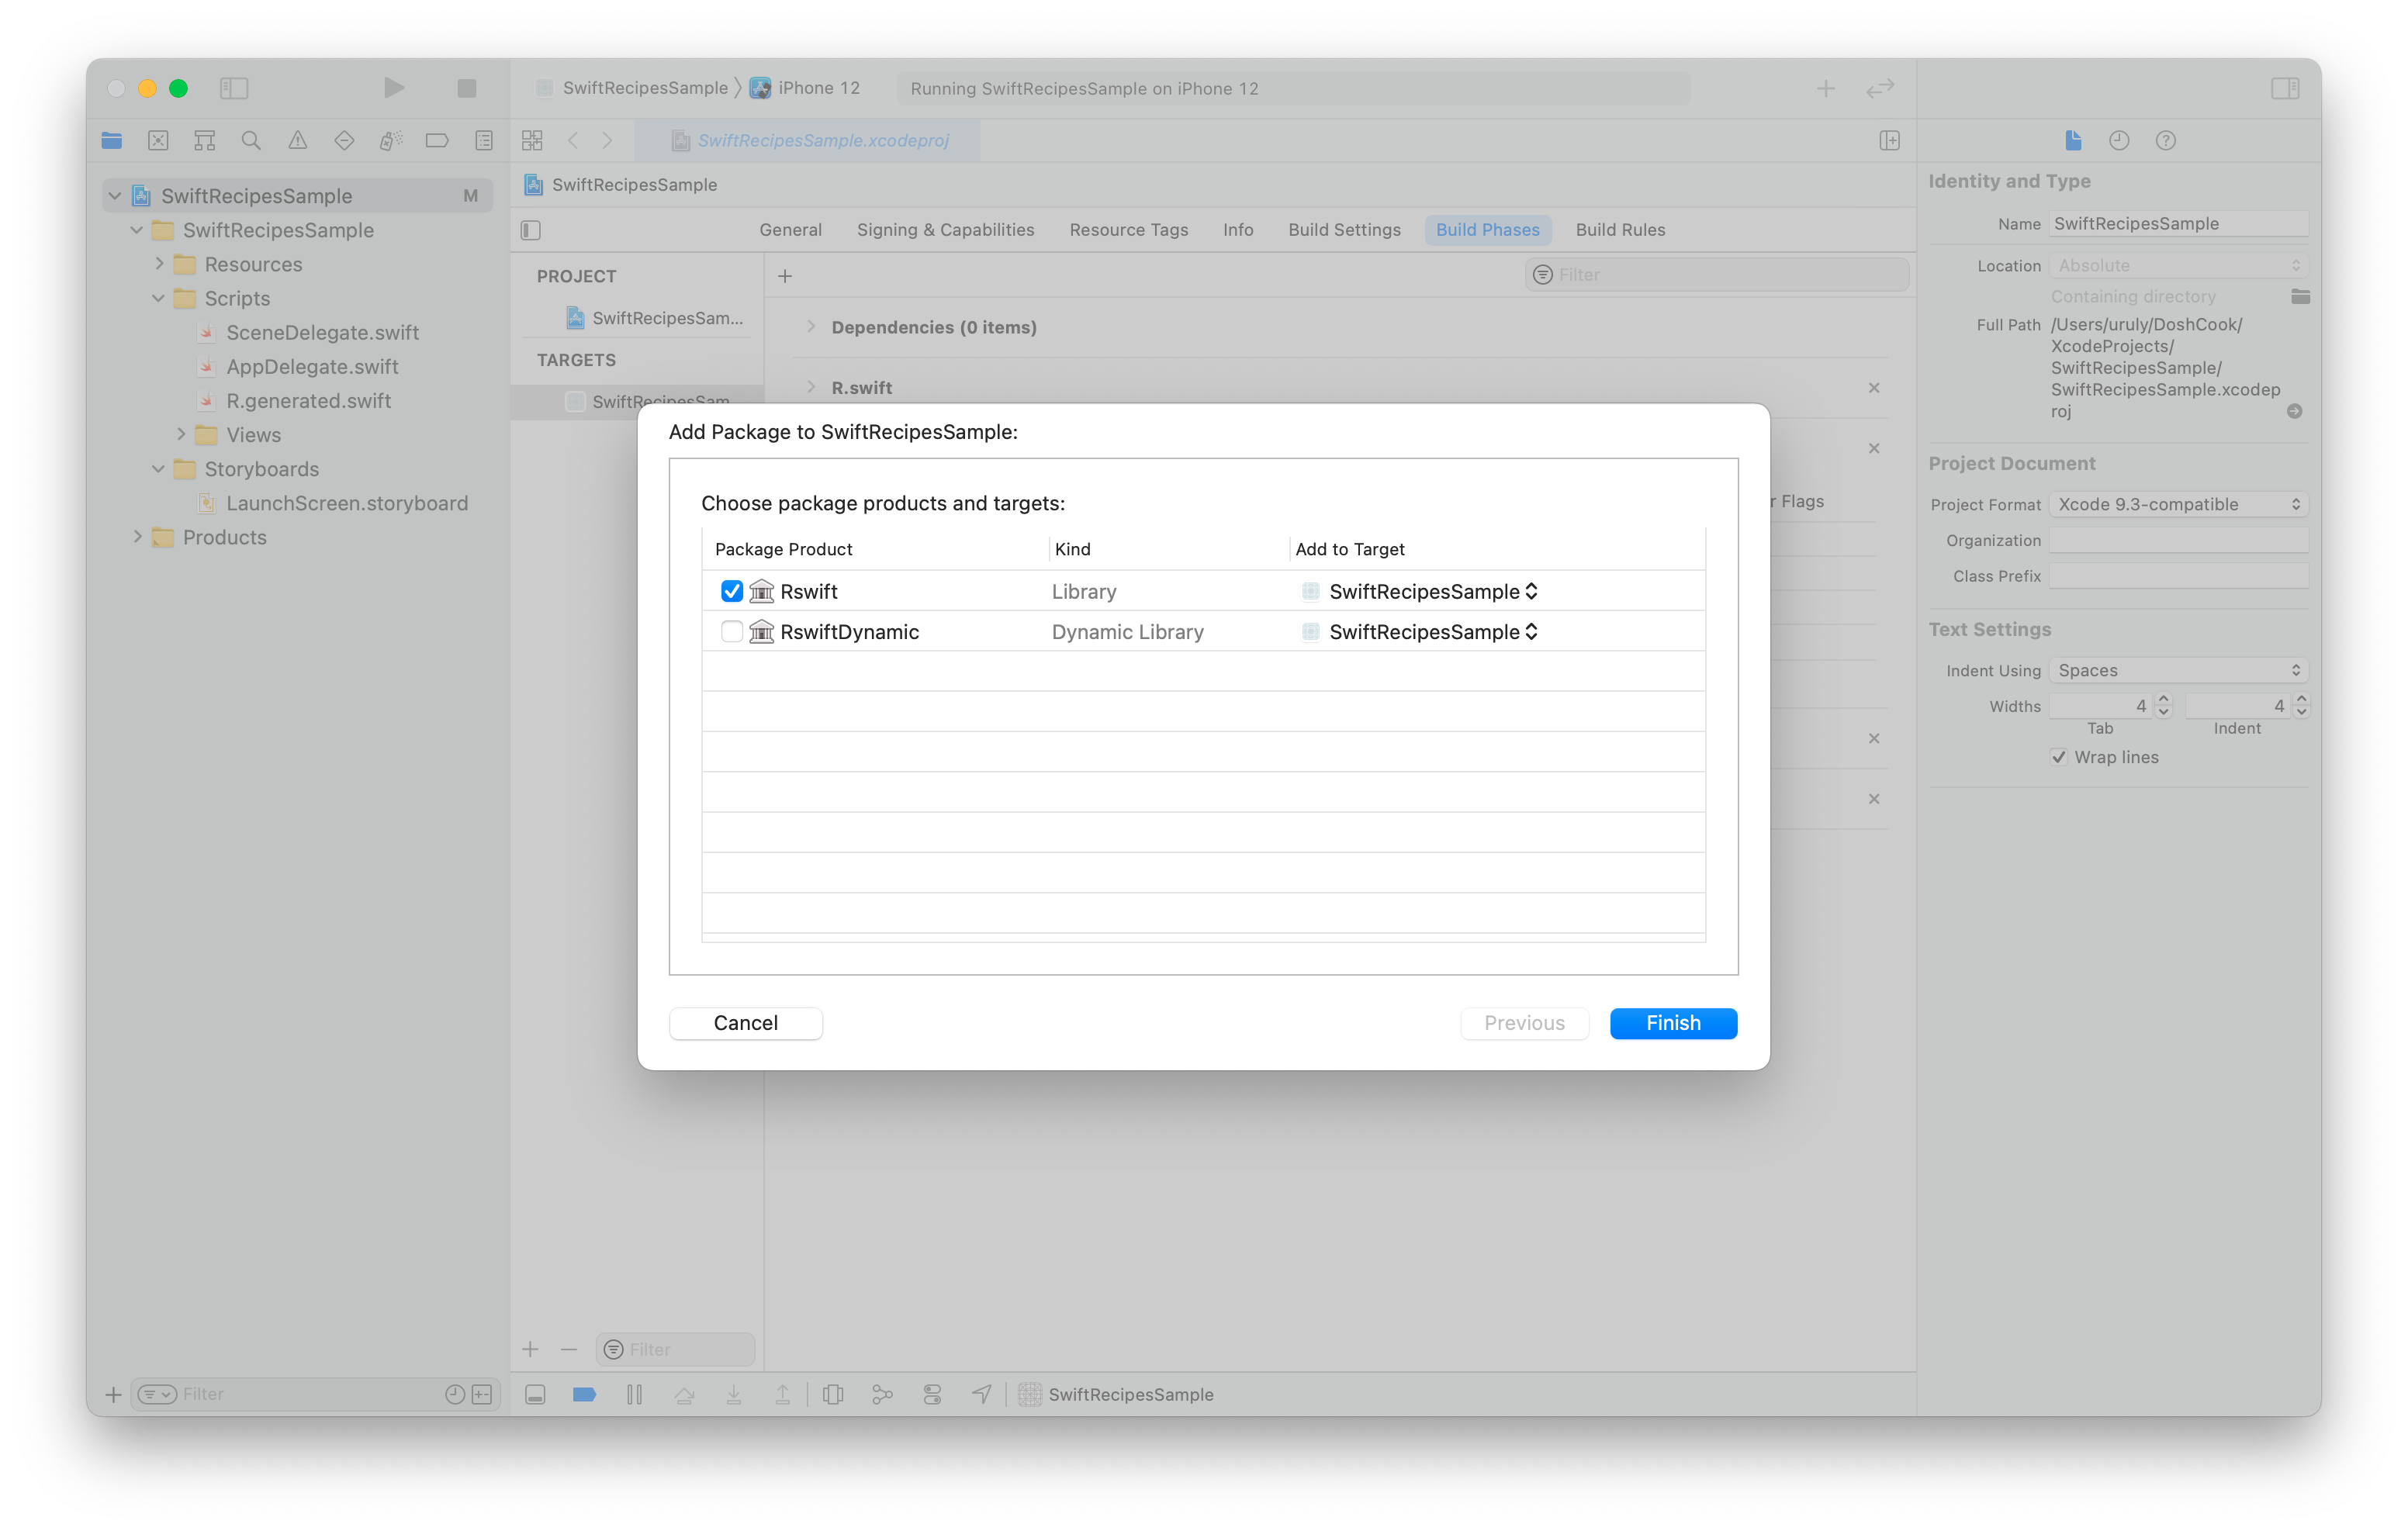
Figure 9
Now you can install R.swift.
Ignore R.generated.swift in .gitignore
The file R.generated.swift is generated automatically. This file should be removed from Git's control.
Add this to .gitignore.
R.generated.swiftIf it has already been managed, delete the cache and remove it from the repository.
git rm --cached `git ls-files --full-name -i --exclude-standard`