


R.swiftを導入する
環境構築R.swift は xib を使った開発には、とても便利になるので是非導入しておいてください。
本サイトのレシピの多くで用いていきます。
R.swift とは
R.swift はリソース管理をしやすくするライブラリです。リソースに型付けを行うことで、文字列のハードコードをする箇所がなくなり、更にはオートコンプリート機能を用いることができるようになります。
R.swiftを用いない場合
// セルの登録
collectionView.register(CustomCollectionViewCell.self, forCellWithReuseIdentifier: "cell")

// セルの再利用時
let cell = collectionView.dequeueReusableCell(withReuseIdentifier: "cell", for: indexPath)

// ViewController の生成時
let viewController = ViewController(nibName: "ViewController", bundle: nil)
R.swiftを用いる場合
// セルの登録
collectionView.register(R.nib.customCollectionViewCell)

// セルの再利用時
let cell = collectionView.dequeueReusableCell(withReuseIdentifier: R.reuseIdentifier.customCollectionViewCell, for: indexPath)!

// ViewController の生成時
let viewController = ViewController(nib: R.nib.viewController)
Mint での導入
今回は Mint を使った R.swift の導入方法を紹介します。その他の方法についてはREADME.mdをご確認ください。
Mintは Swift製のコマンドラインツールのインストールや実行を管理するツールです。
Mint の導入
Mint の導入は
// Mint のインストール
$ brew install mint
// バージョン確認
$ mint version
で行うことができます。
-
インストール
プロジェクトのルートにMintfileを作成します。cd プロジェクト名 touch Mintfile. ├─ プロジェクト名.xcodeproj ├─ プロジェクト名 └─ MintfileMintfileに 以下を記述します。mac-cain13/R.swift // バージョン指定ありの場合 mac-cain13/R.swift@v5.3.1Mintfileのある場所でmint bootstrapを行います。mint bootstrap -
Run Script を追加する
Xcodeでプロジェクトを開き、
TARGETS>BuidPhasesを開き、+ボタンよりNew Run Script Phaseを選択します。(図1)
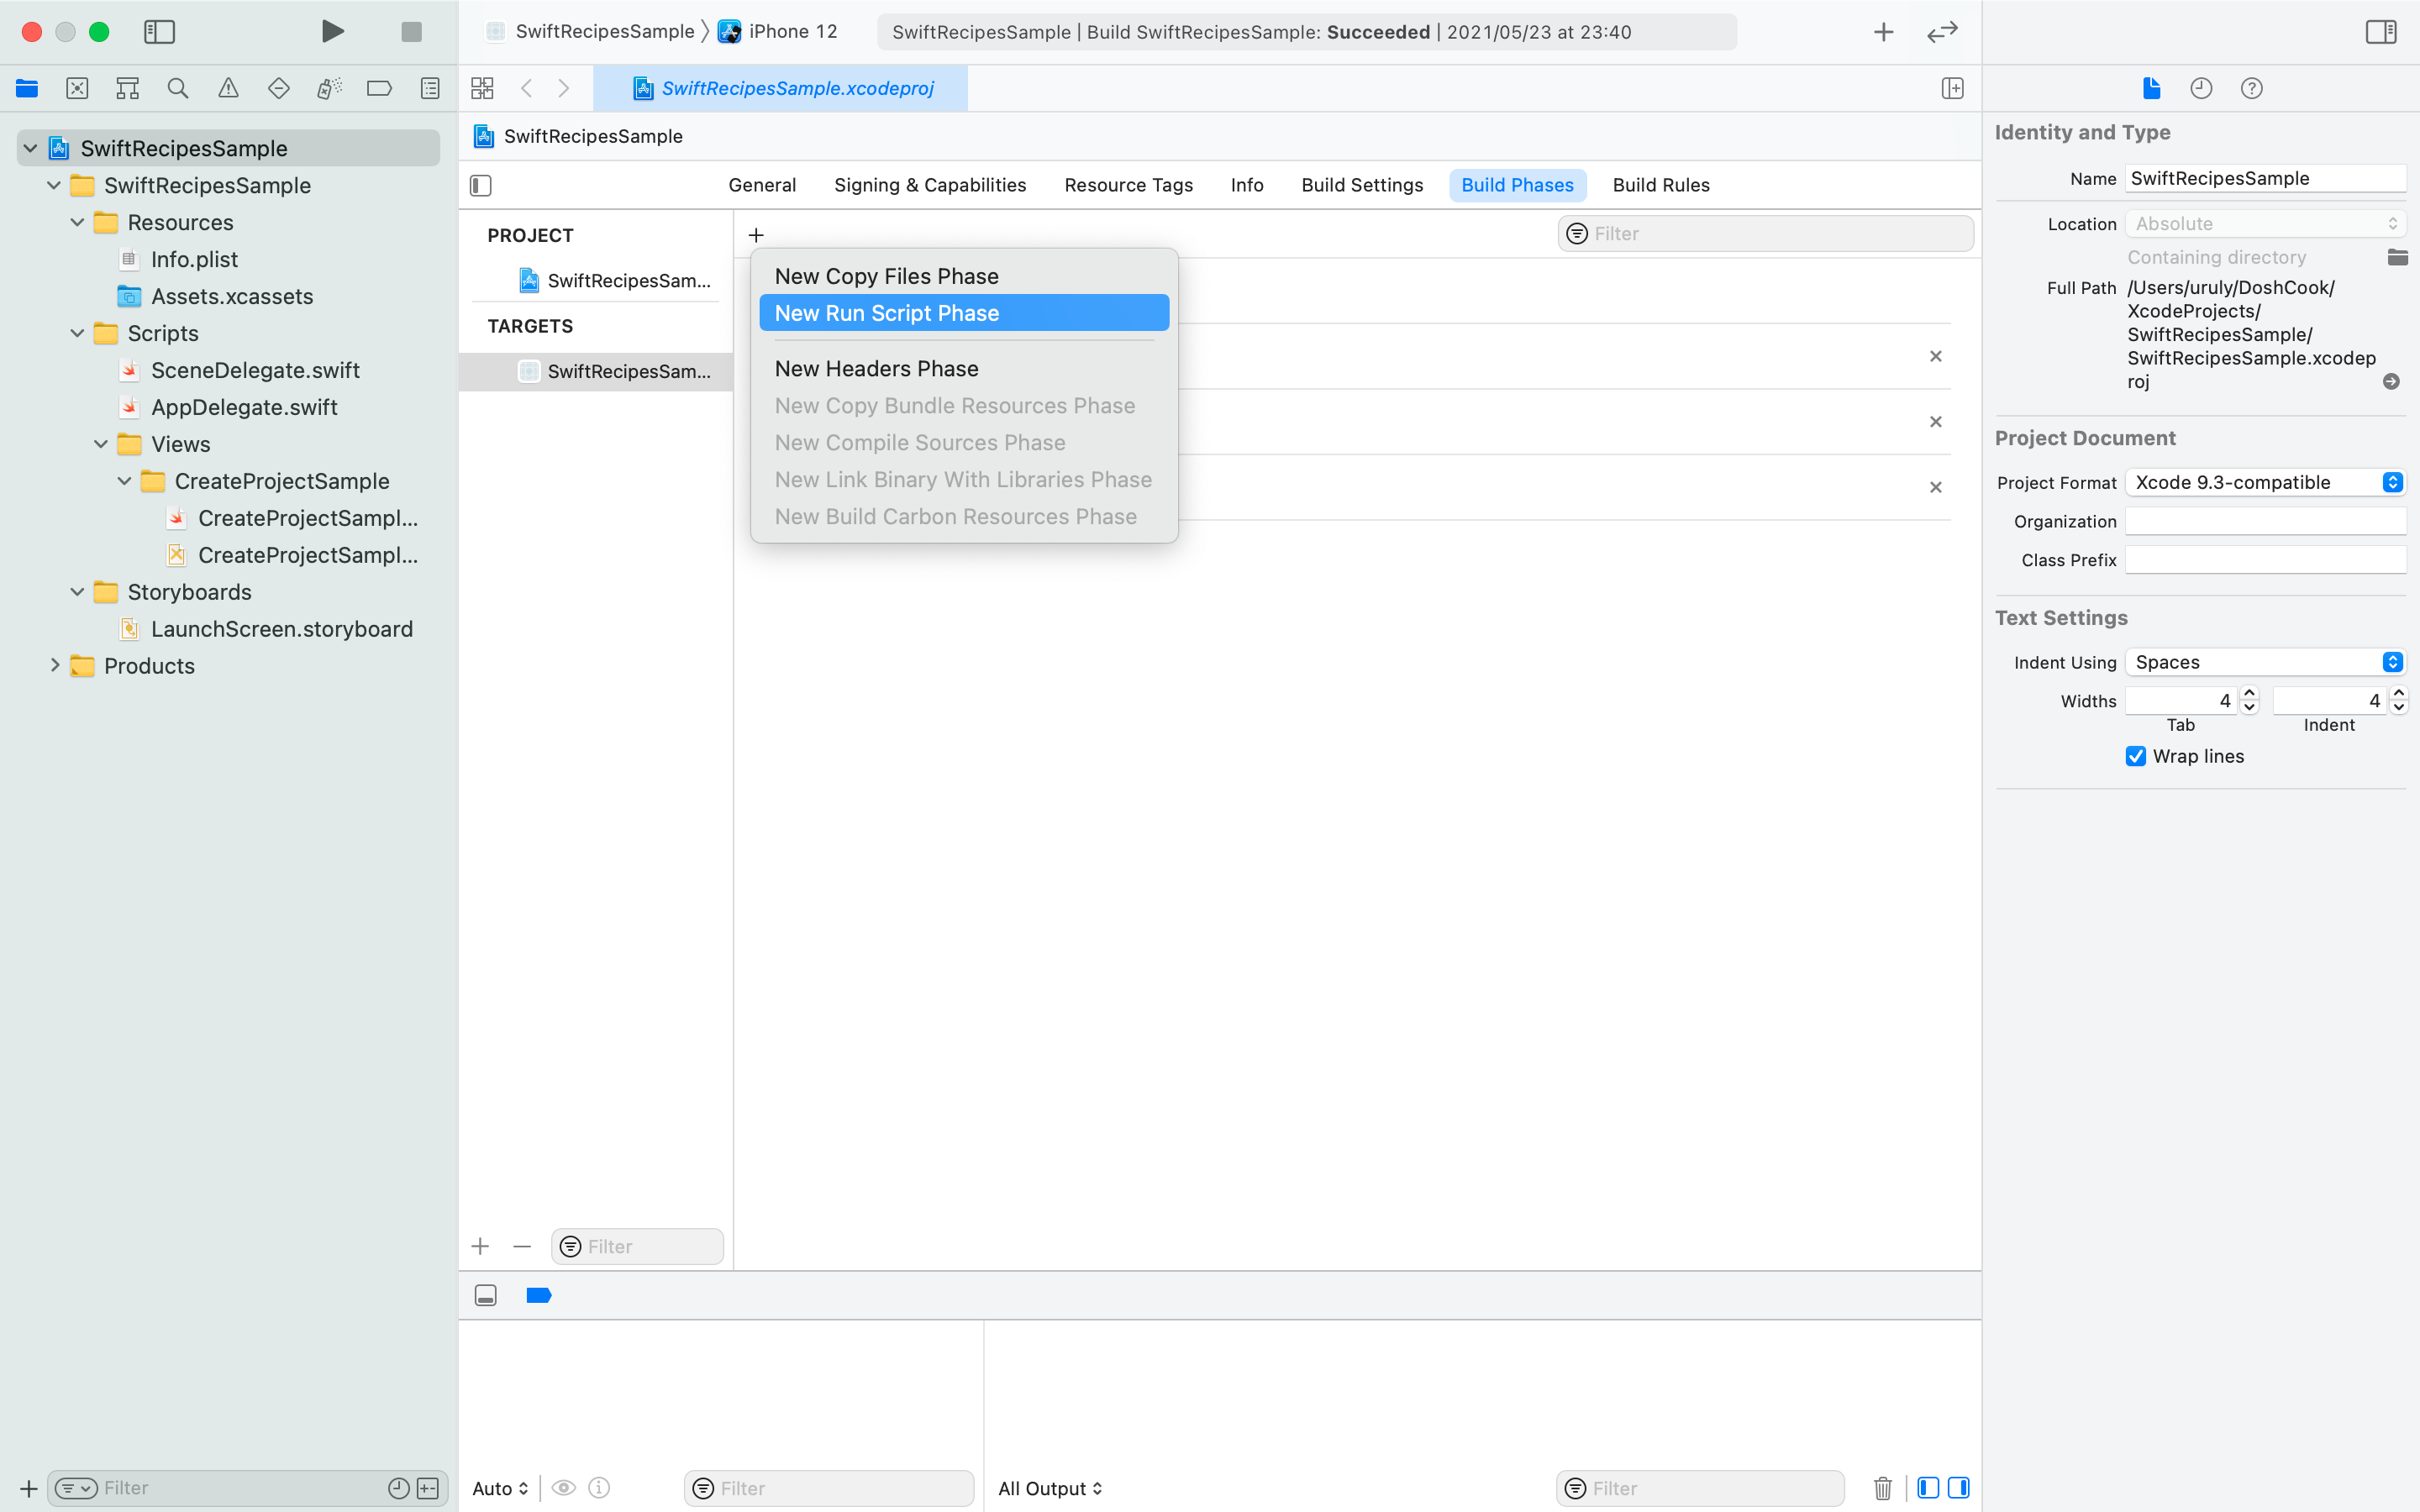
図1以下の Script を追加します。(図2)
if mint list | grep -q 'R.swift'; then
mint run R.swift rswift generate "$SRCROOT/プロジェクト名/Scripts/R.generated.swift"
else
echo "error: R.swift not installed; run 'mint bootstrap' to install"
return -1
fi
Input Files$TEMP_DIR/rswift-lastrunOutput Files$SRCROOT/プロジェクト名/Scripts/R.generated.swiftをそれぞれ追加します。(図2)
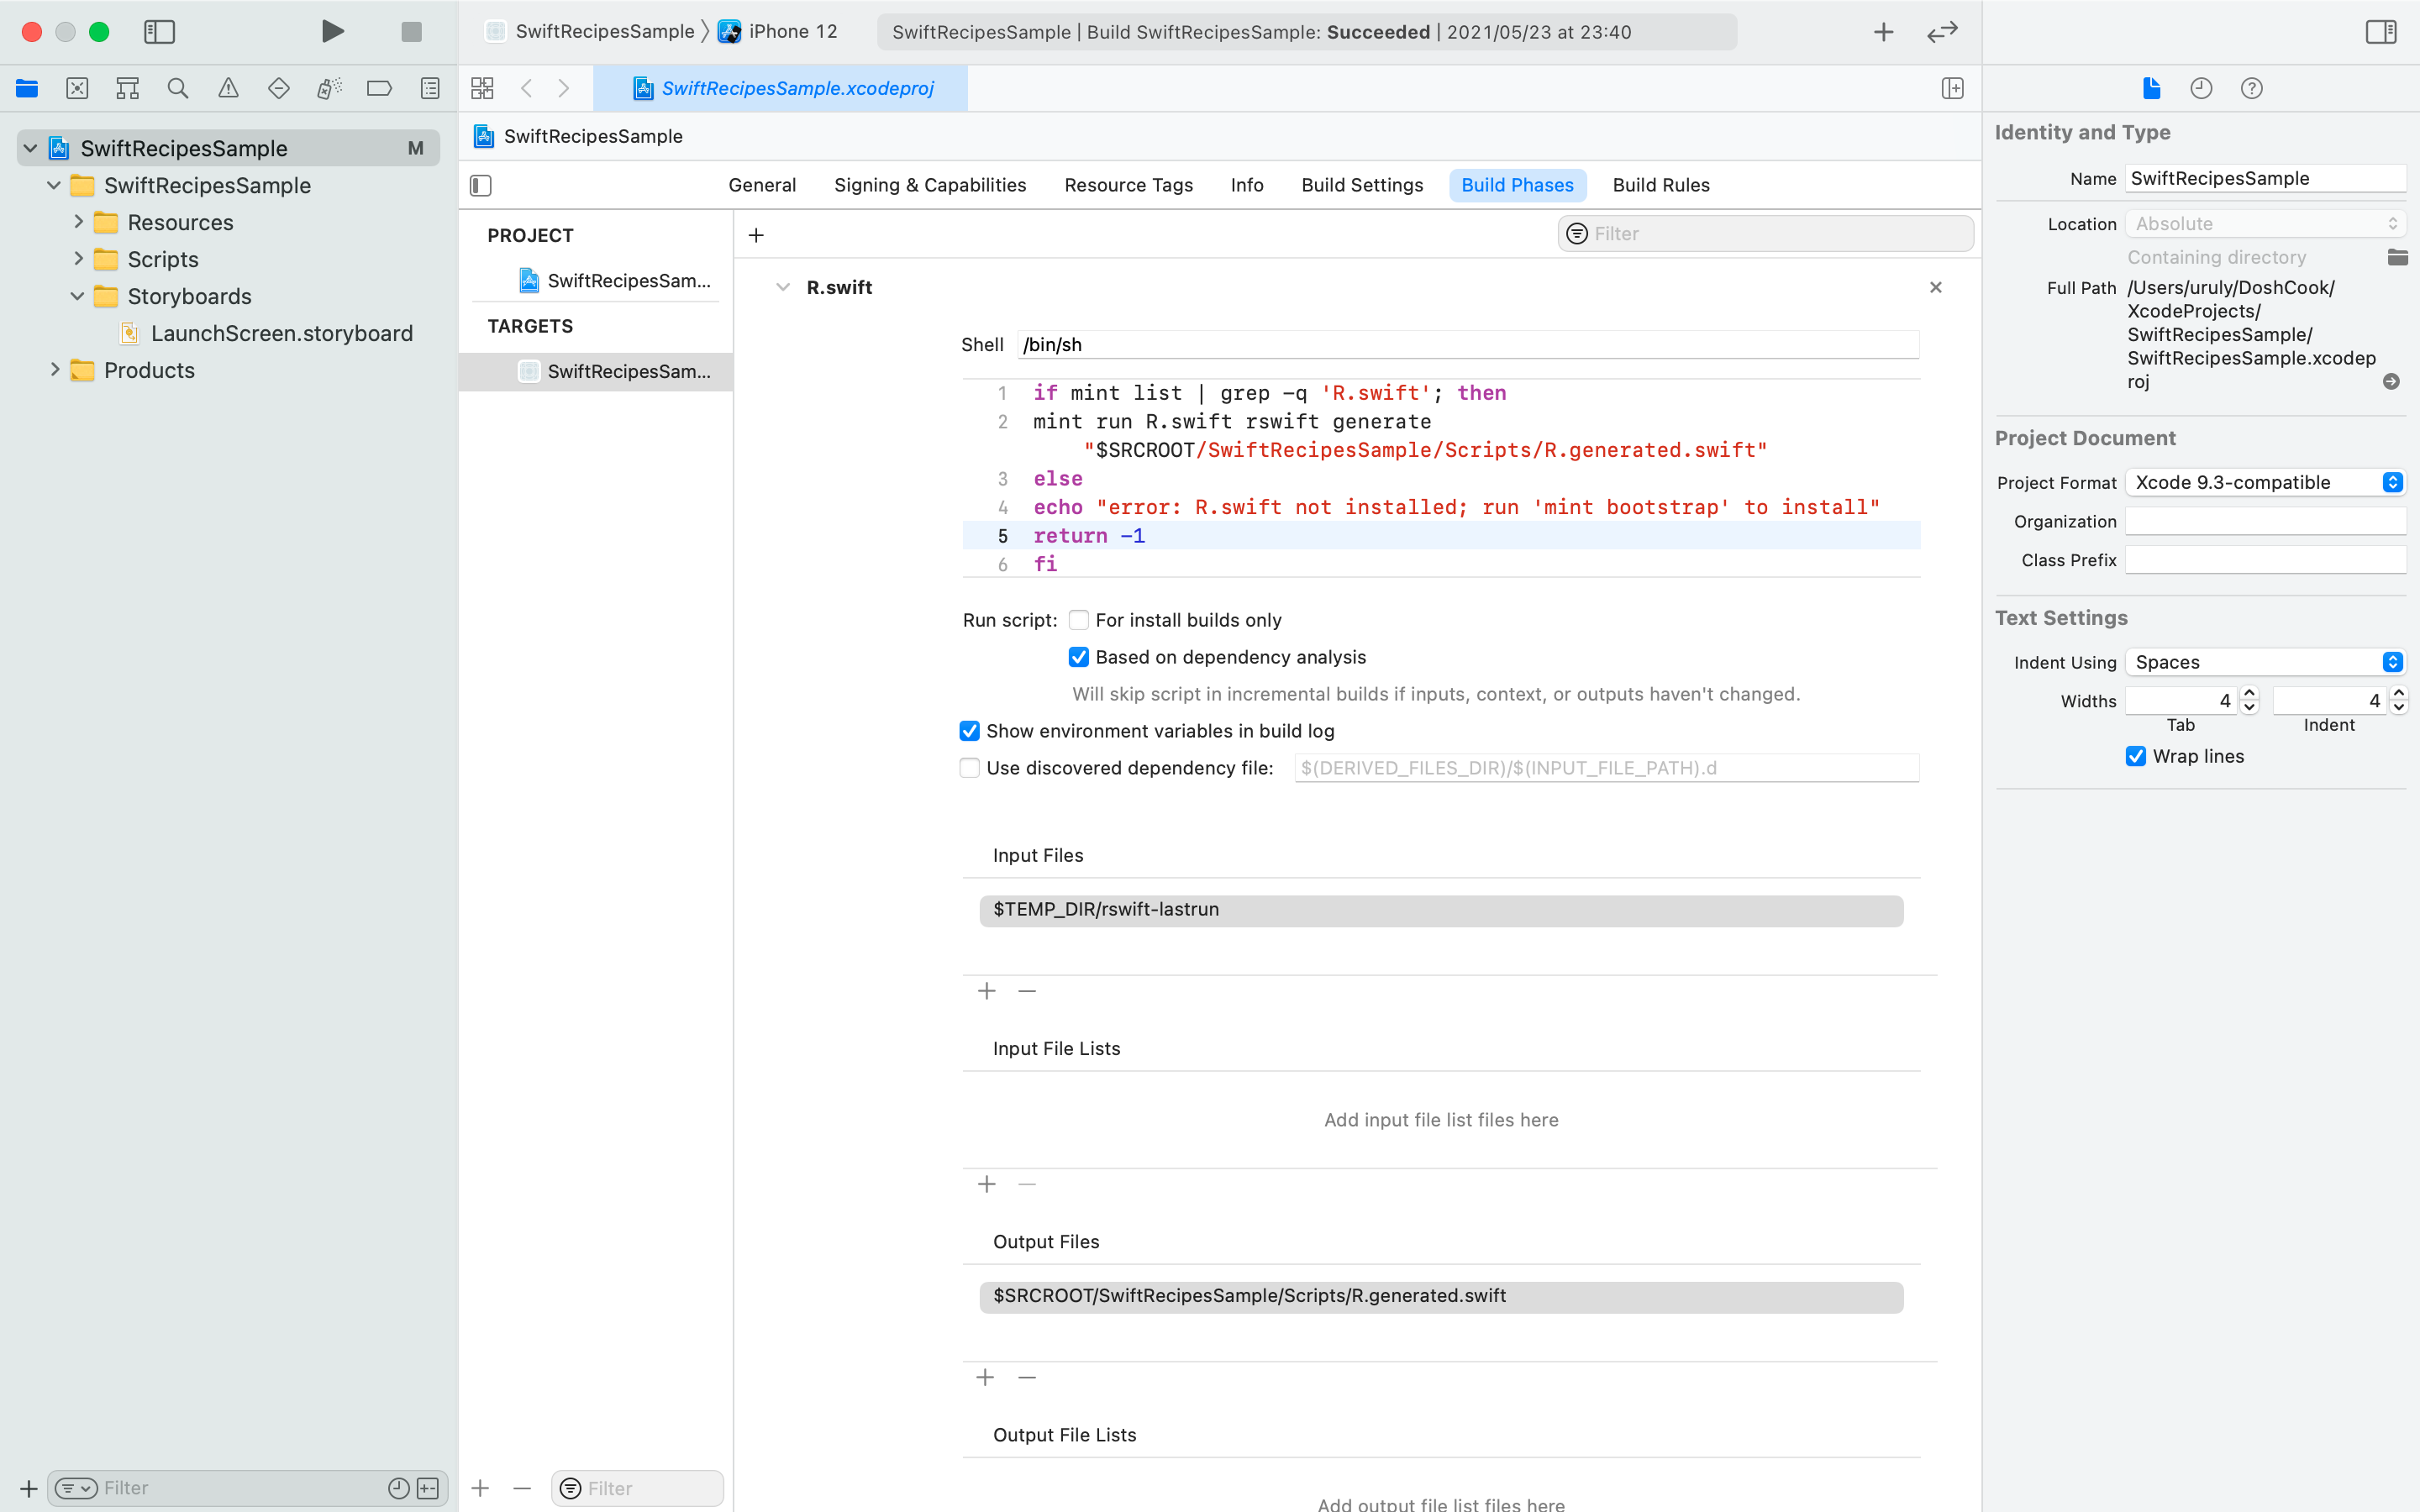
図2最後に
Compile Sourcesの前に持っていき(図3)、ビルドをしましょう。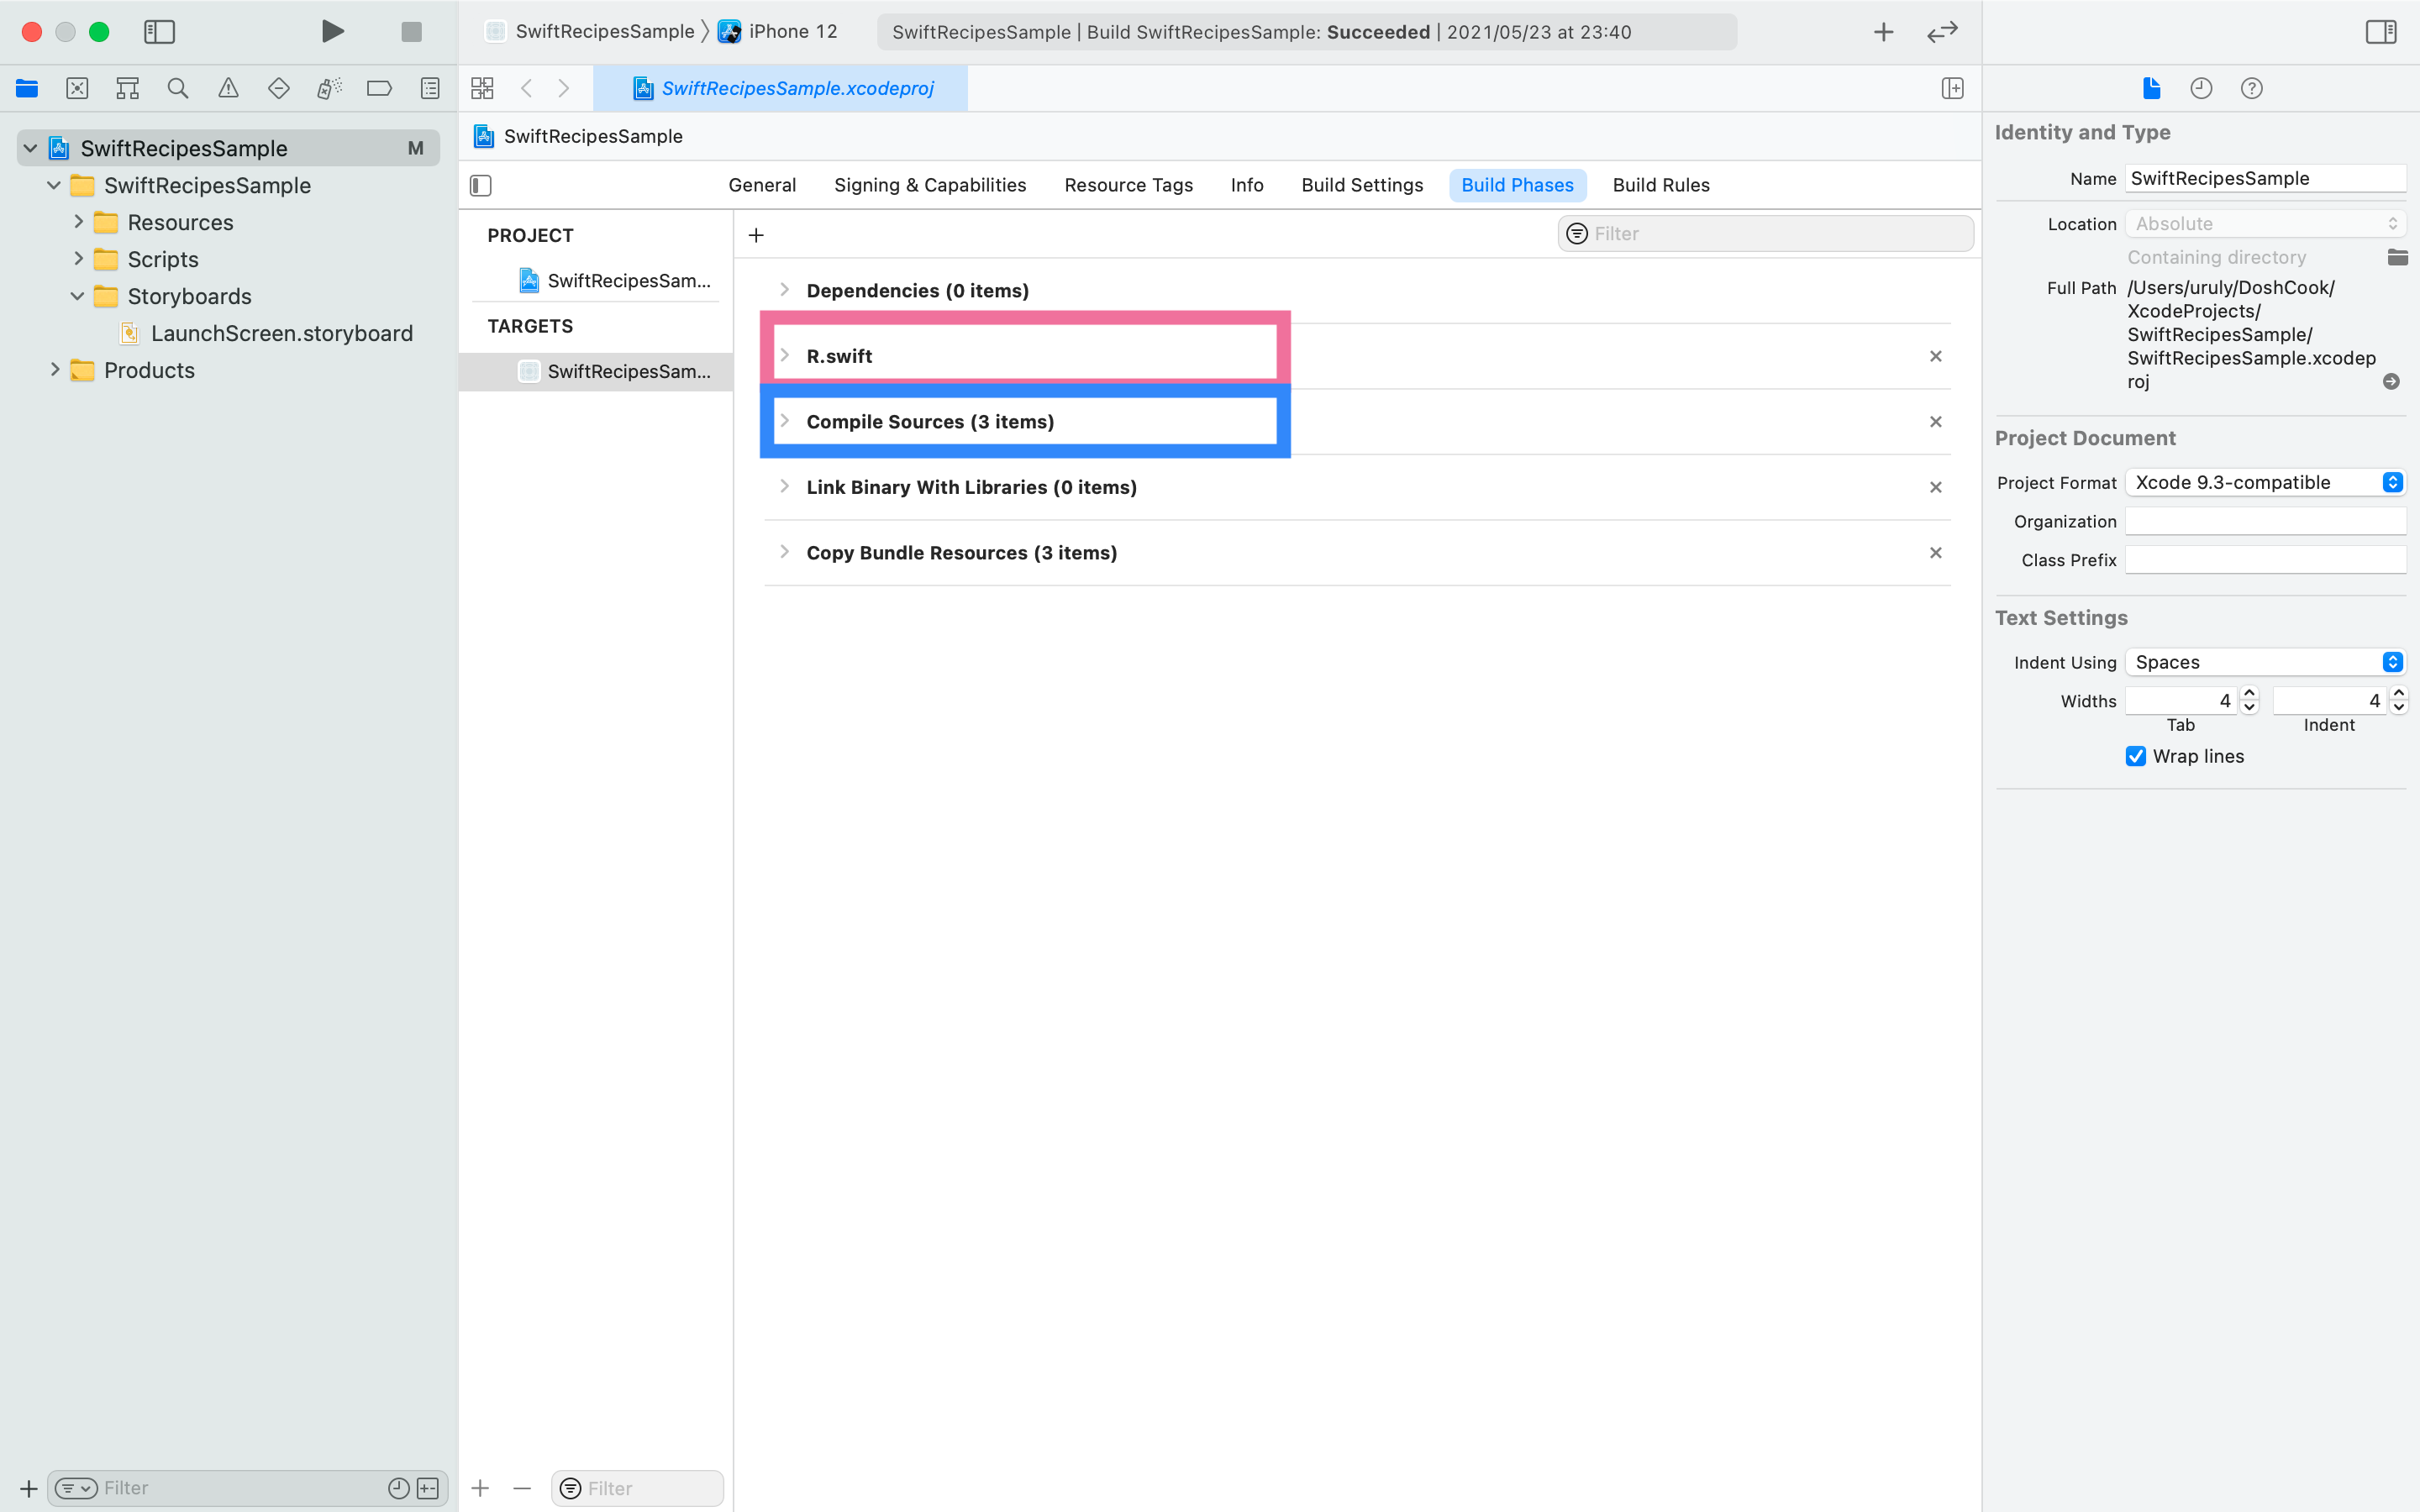
図3Compile Sources の後に配置しておくと、エラーが出る可能性があるので必ず移動させましょう。
-
R.generated.swift をプロジェクトに追加する
2の手順でビルドをしたら、
Output Filesに指定した場所にR.generated.swiftが生成されるので、それを Xcode 上に追加します。(図4)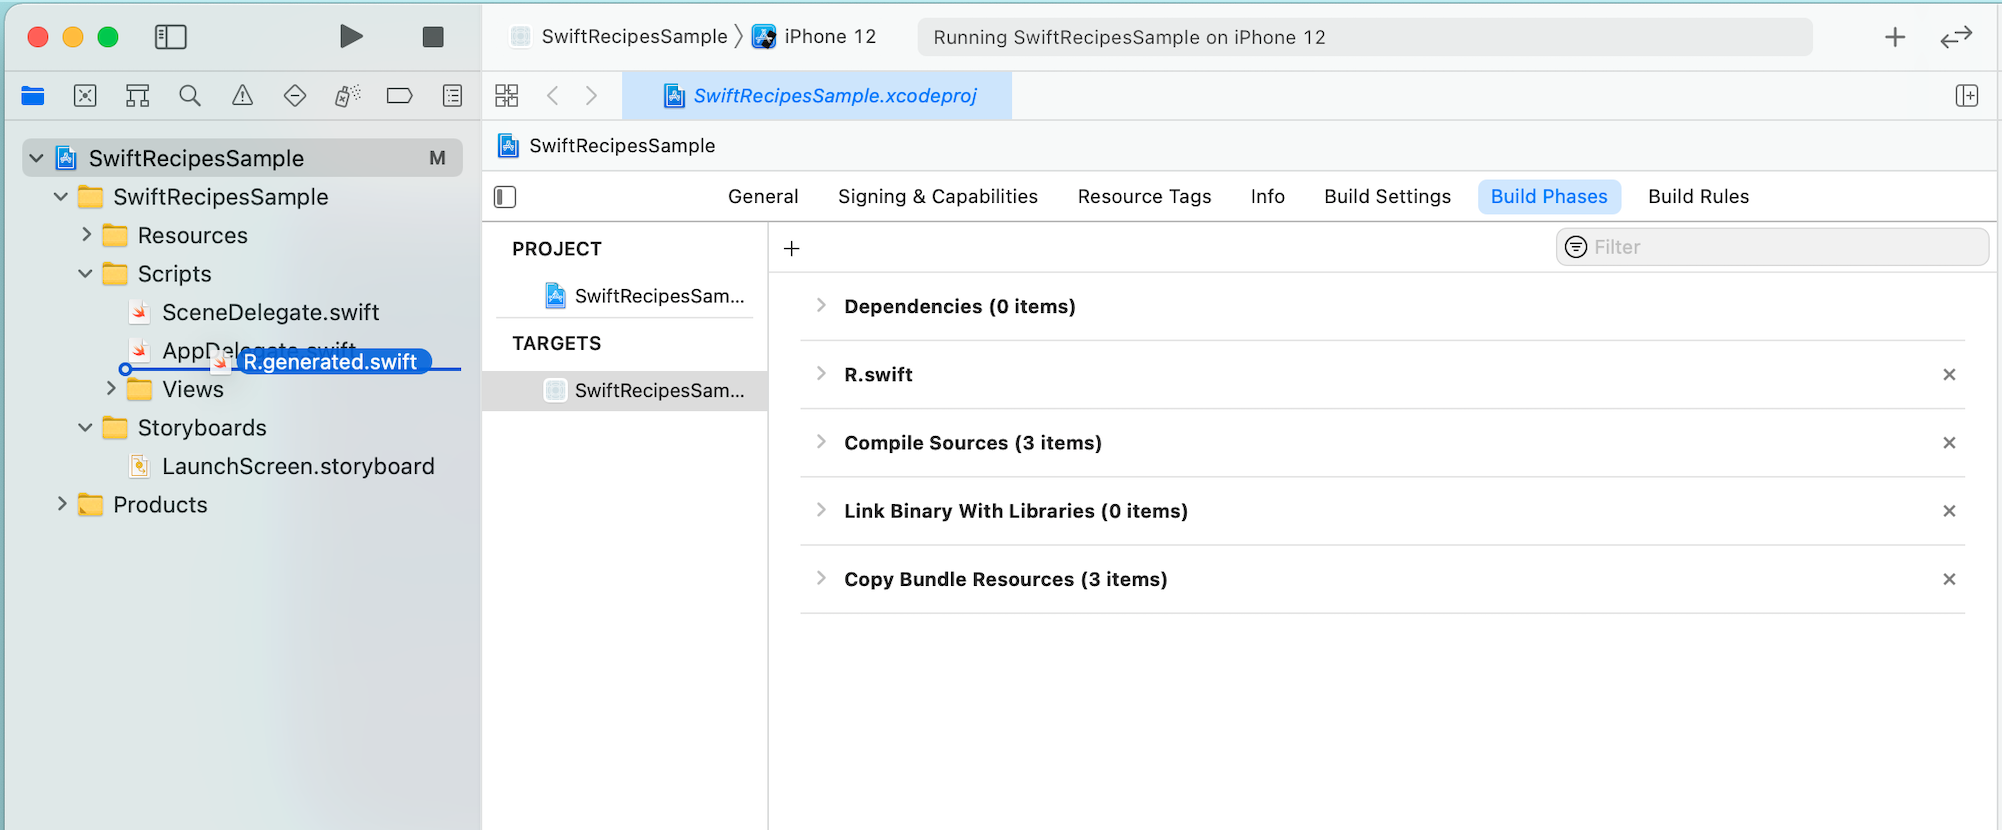
図4追加する際には、
Copy If Neededのチェックをオフにします。(図5)
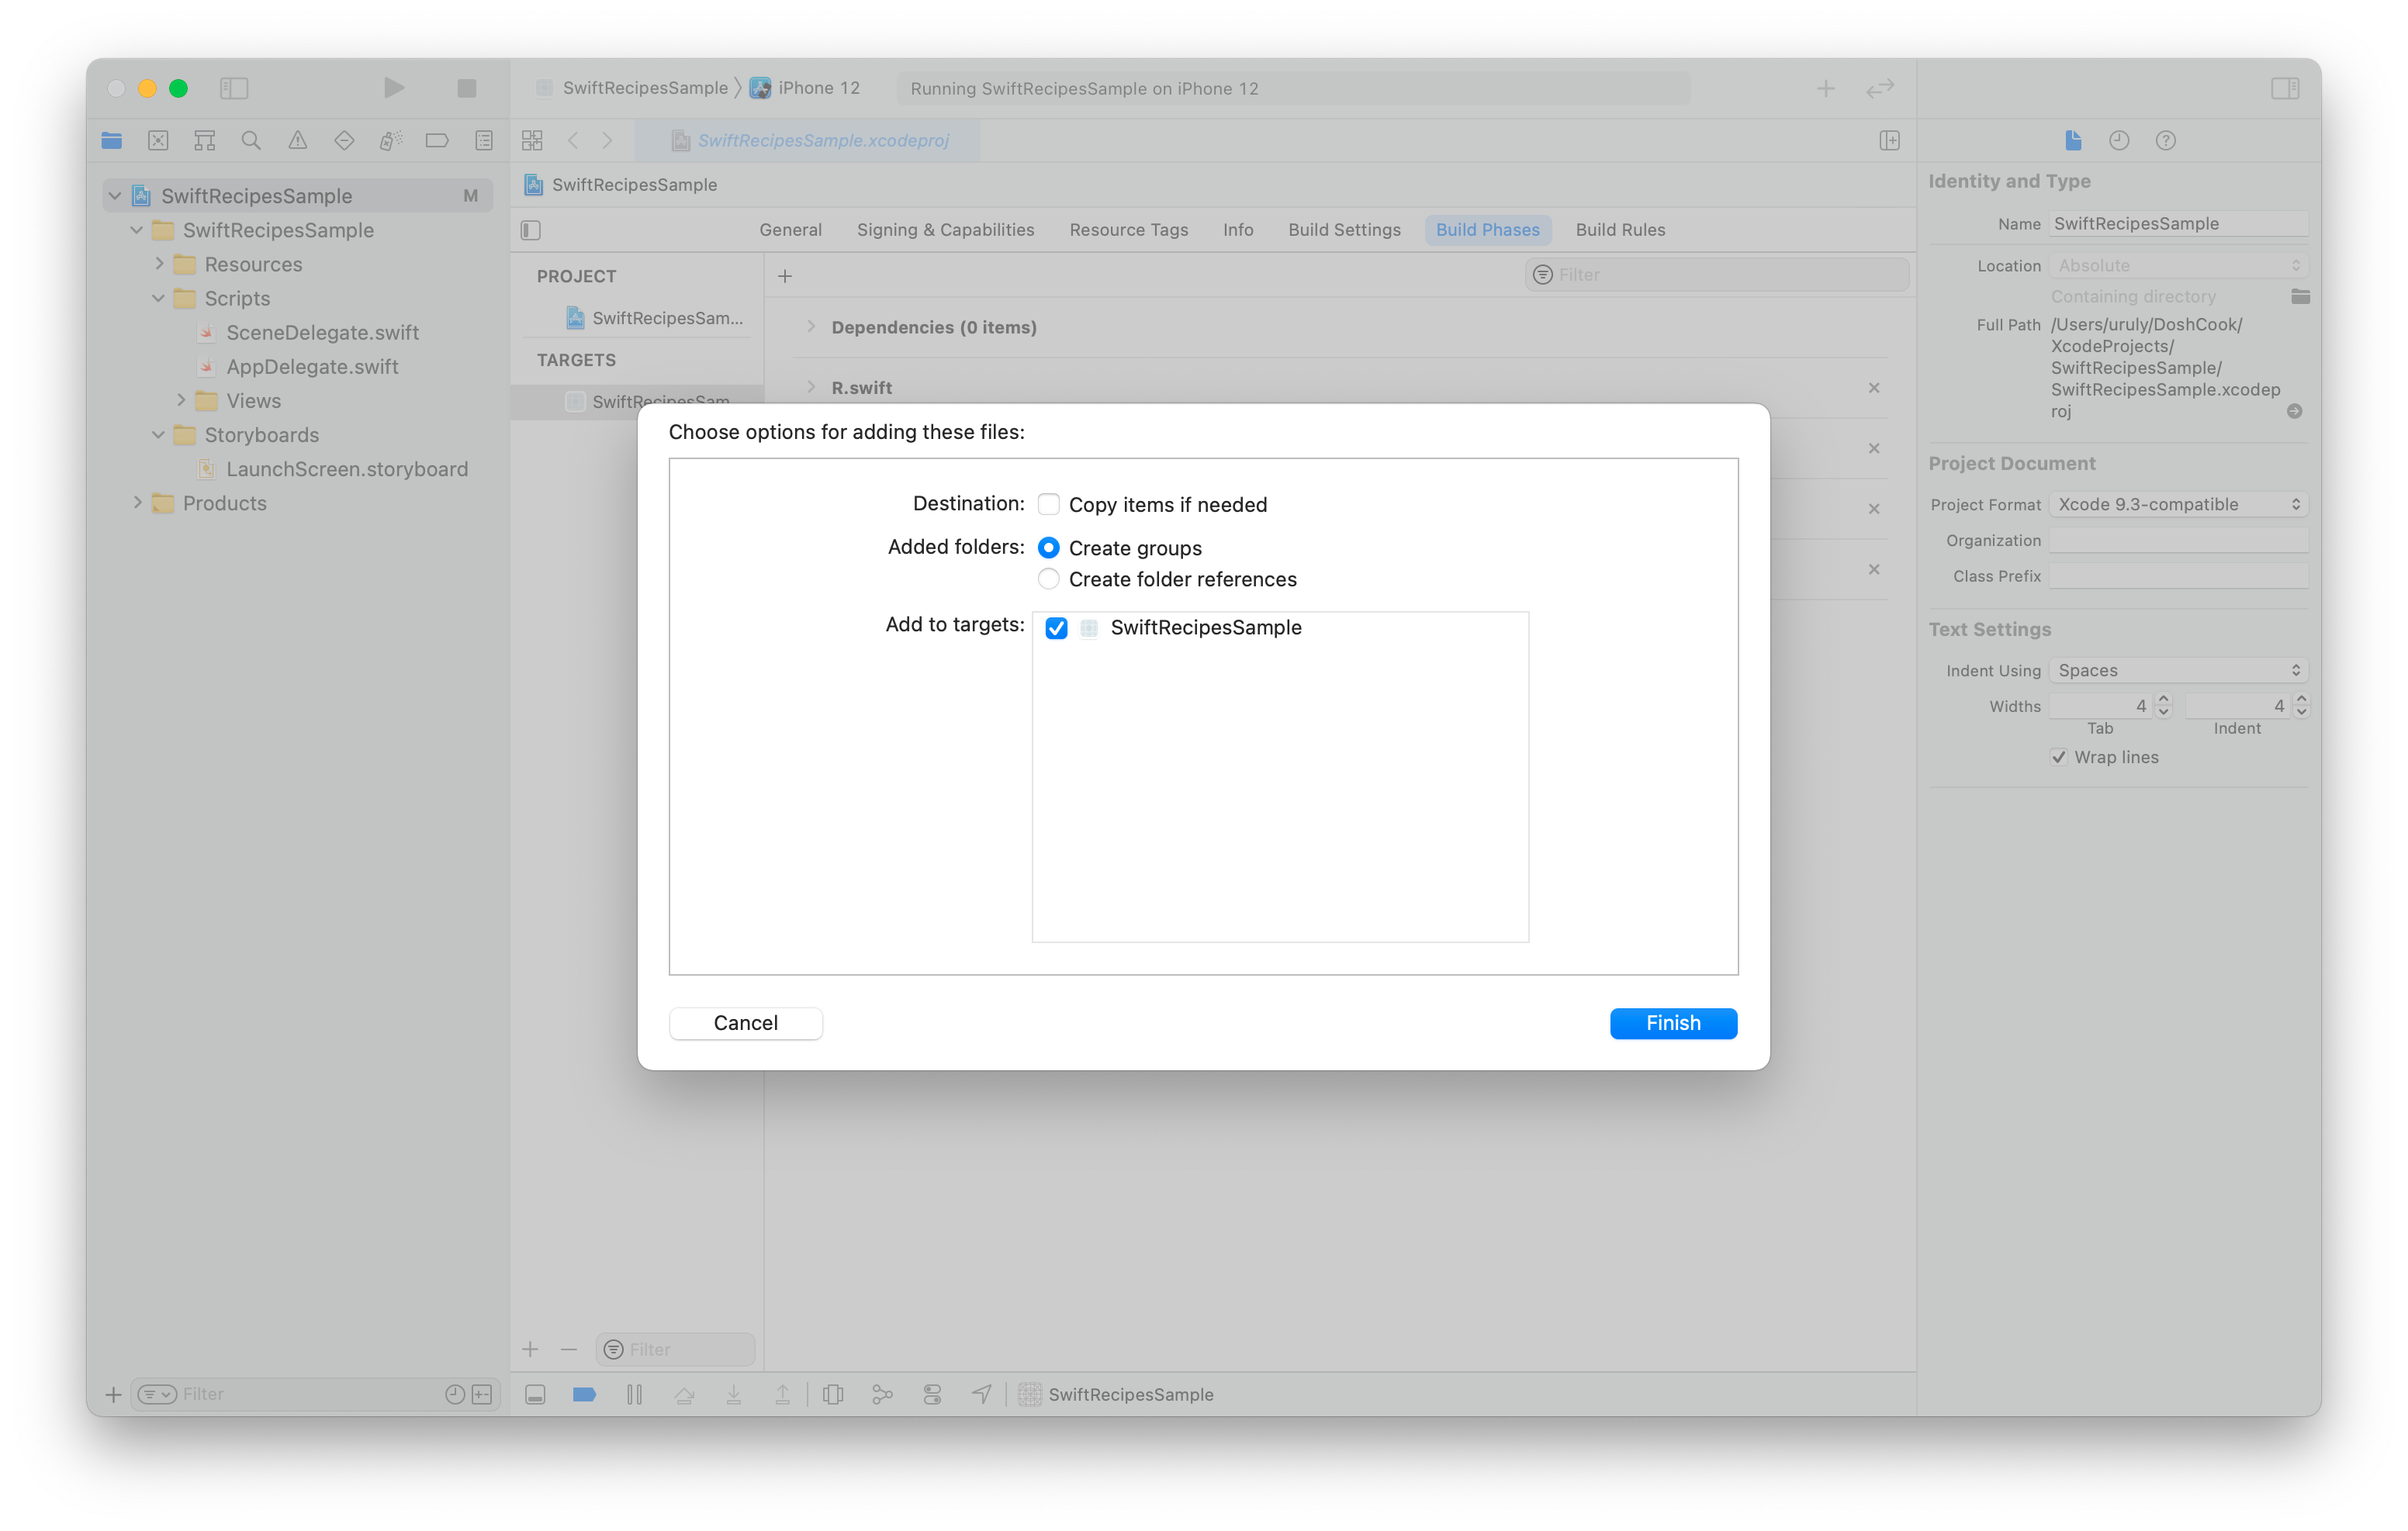
図5 -
Swift Package Manager で R.swift.Library を導入する
生成したR.generated.swiftを実際に利用するために、R.swift.Libraryを導入します。mac-cain13/R.swift.Library: Library containing types used by the R.swift project
Xcode のナビゲーションバーより
File>Swift Packages>Add Package Dependencyを選択します。(図6)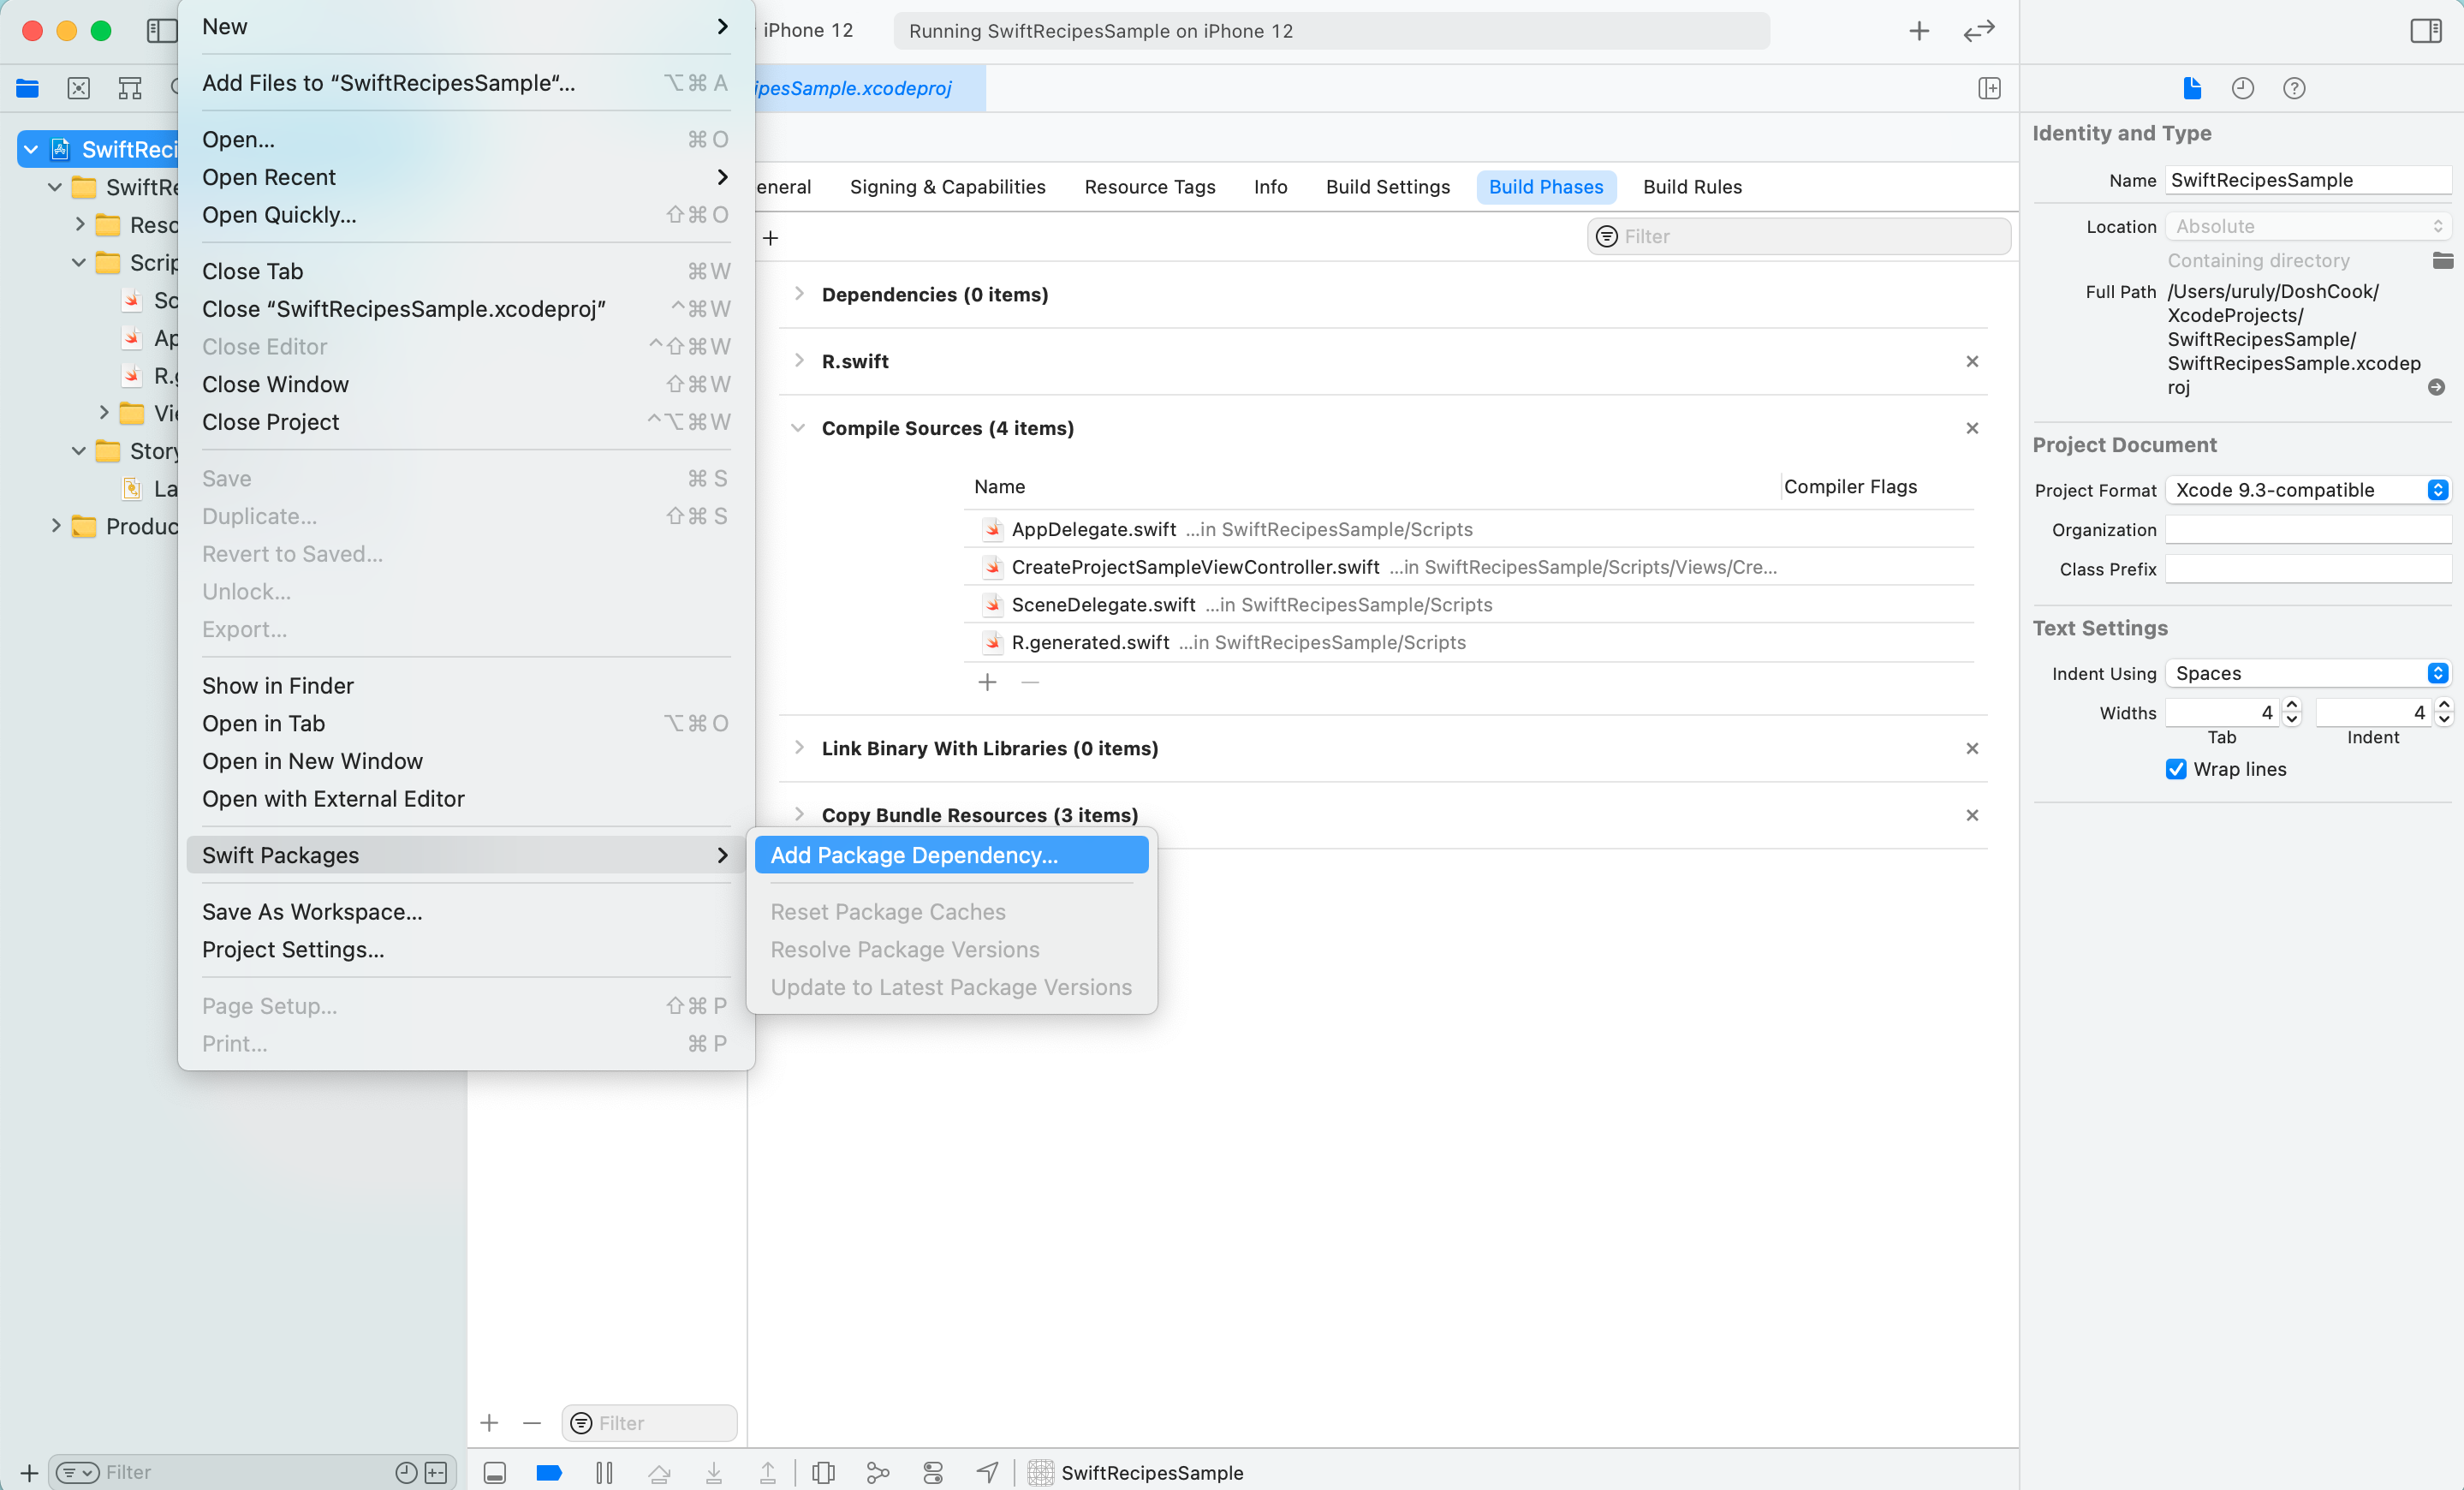
図6Enter package repositry URLにhttps://github.com/mac-cain13/R.swift.Libraryを入力します。(図7)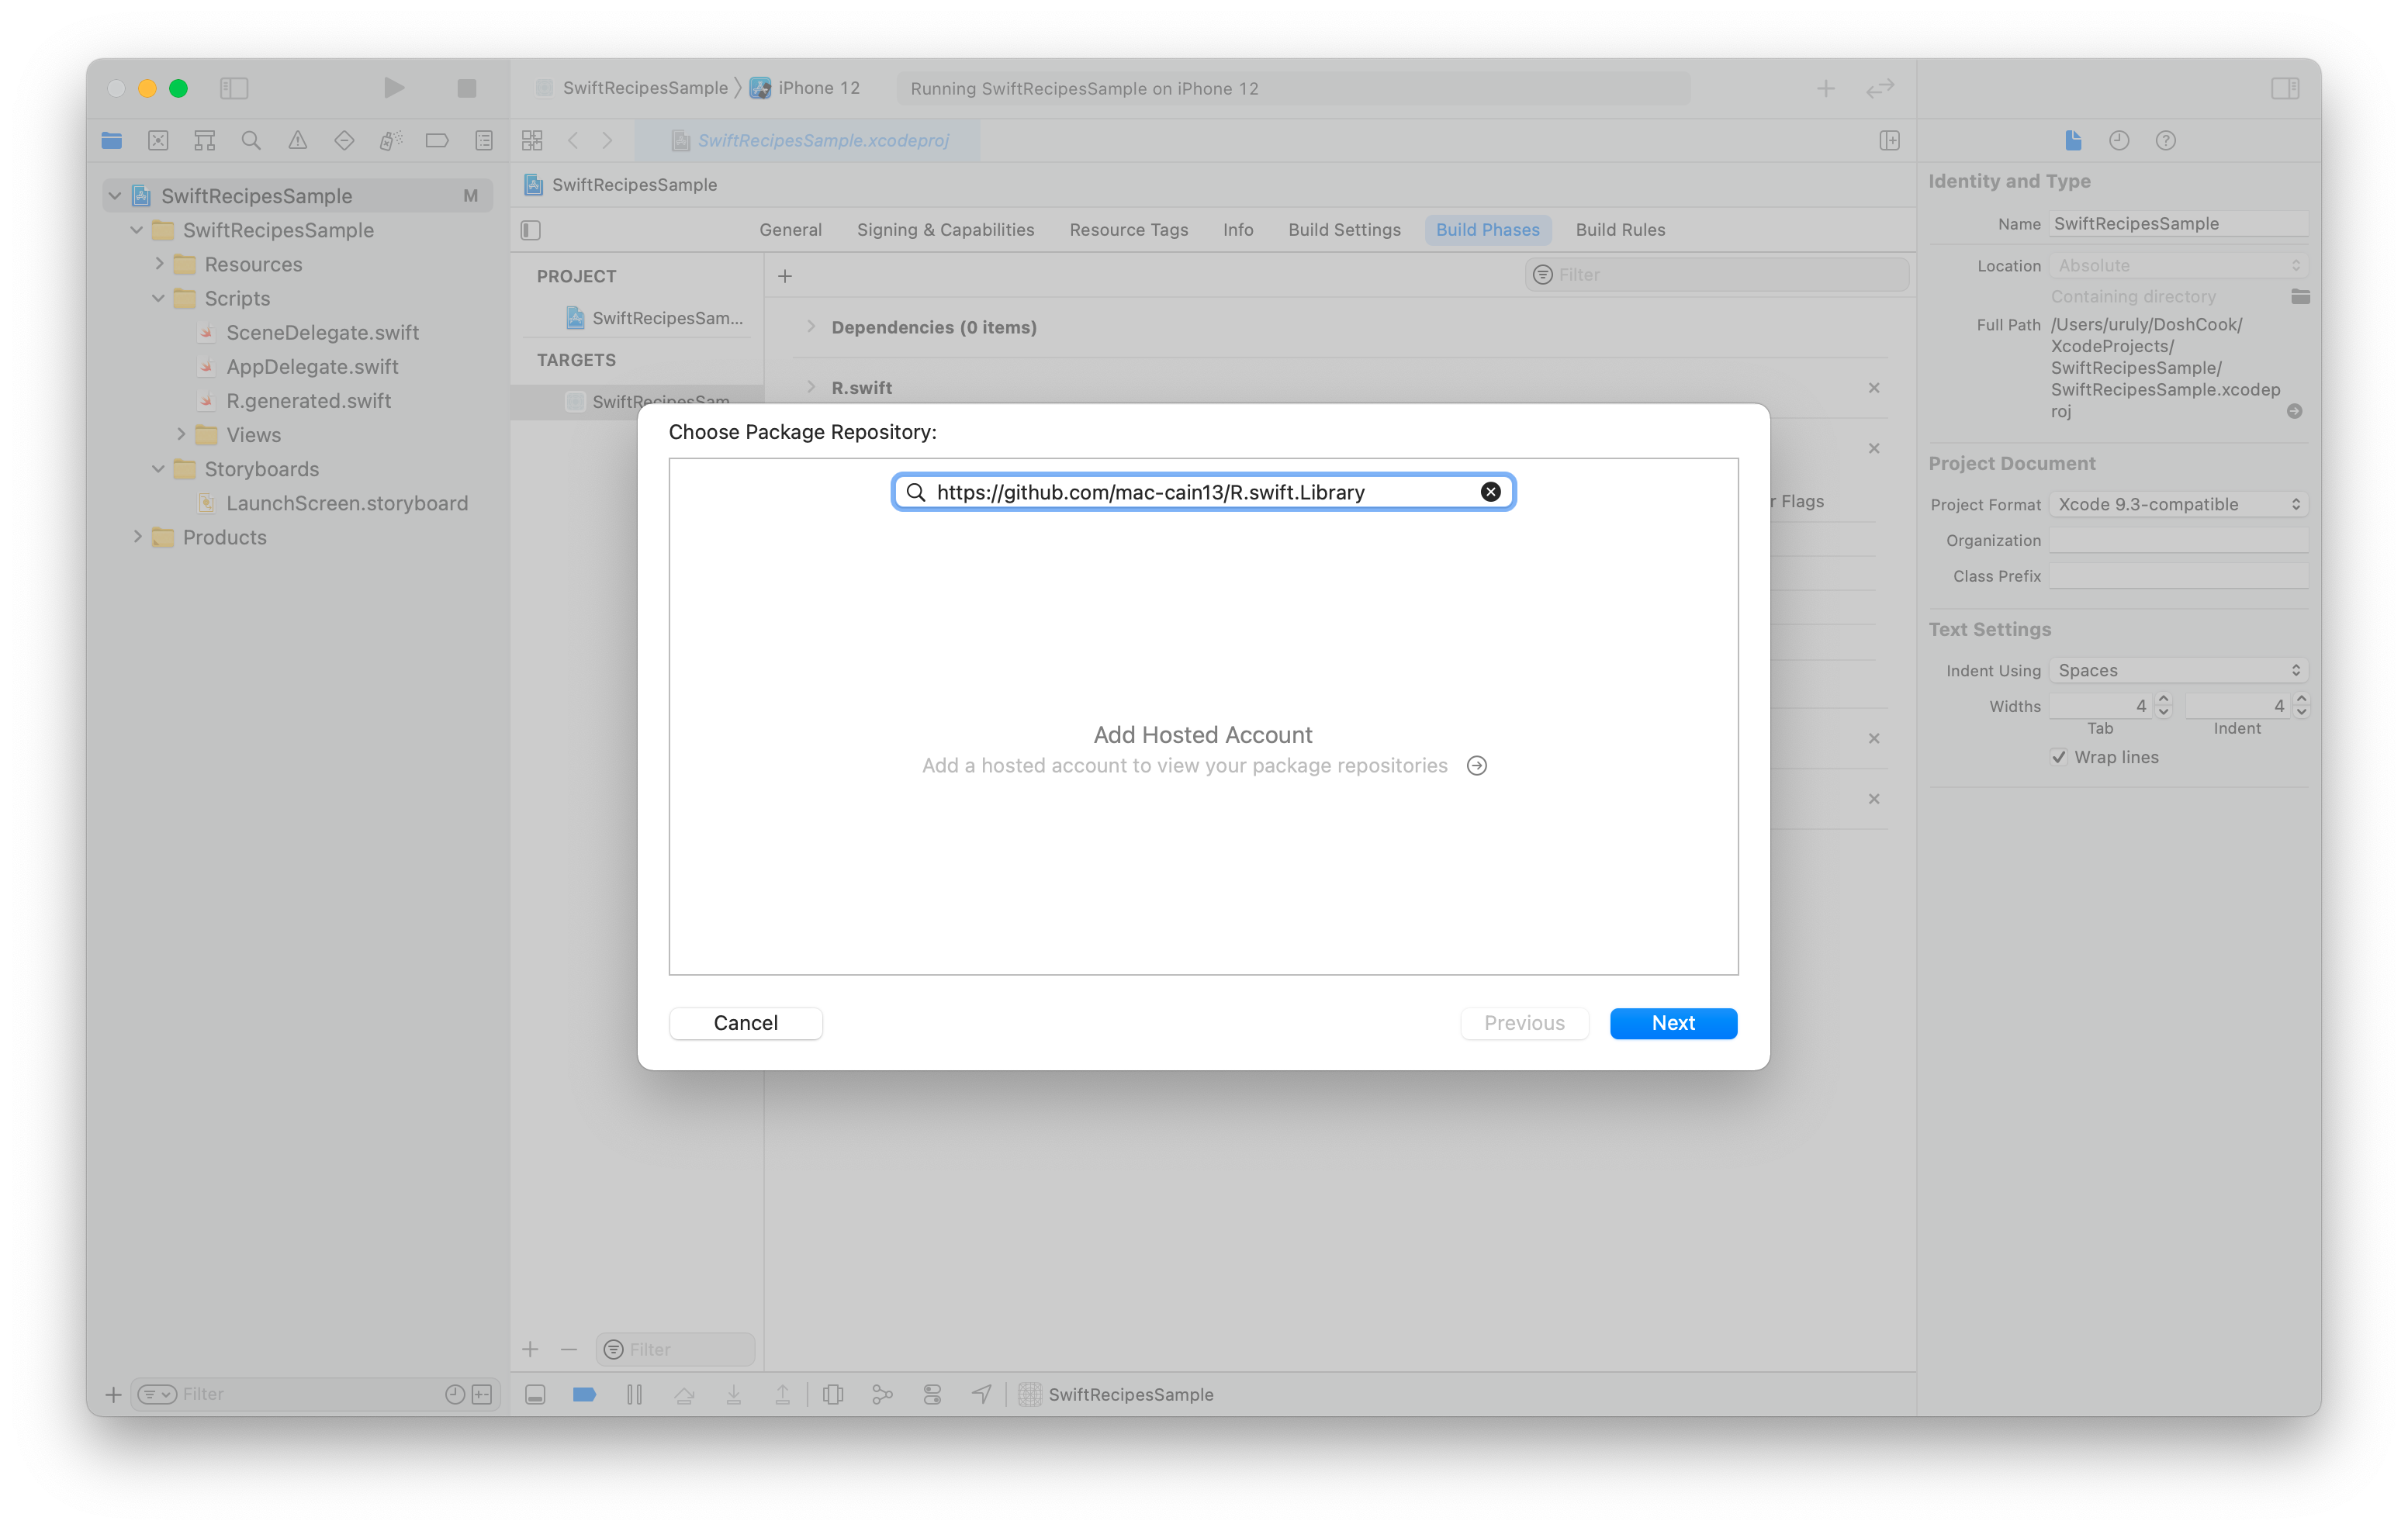
図7Version RulesはUpdate Next Minorを指定しました。(図8)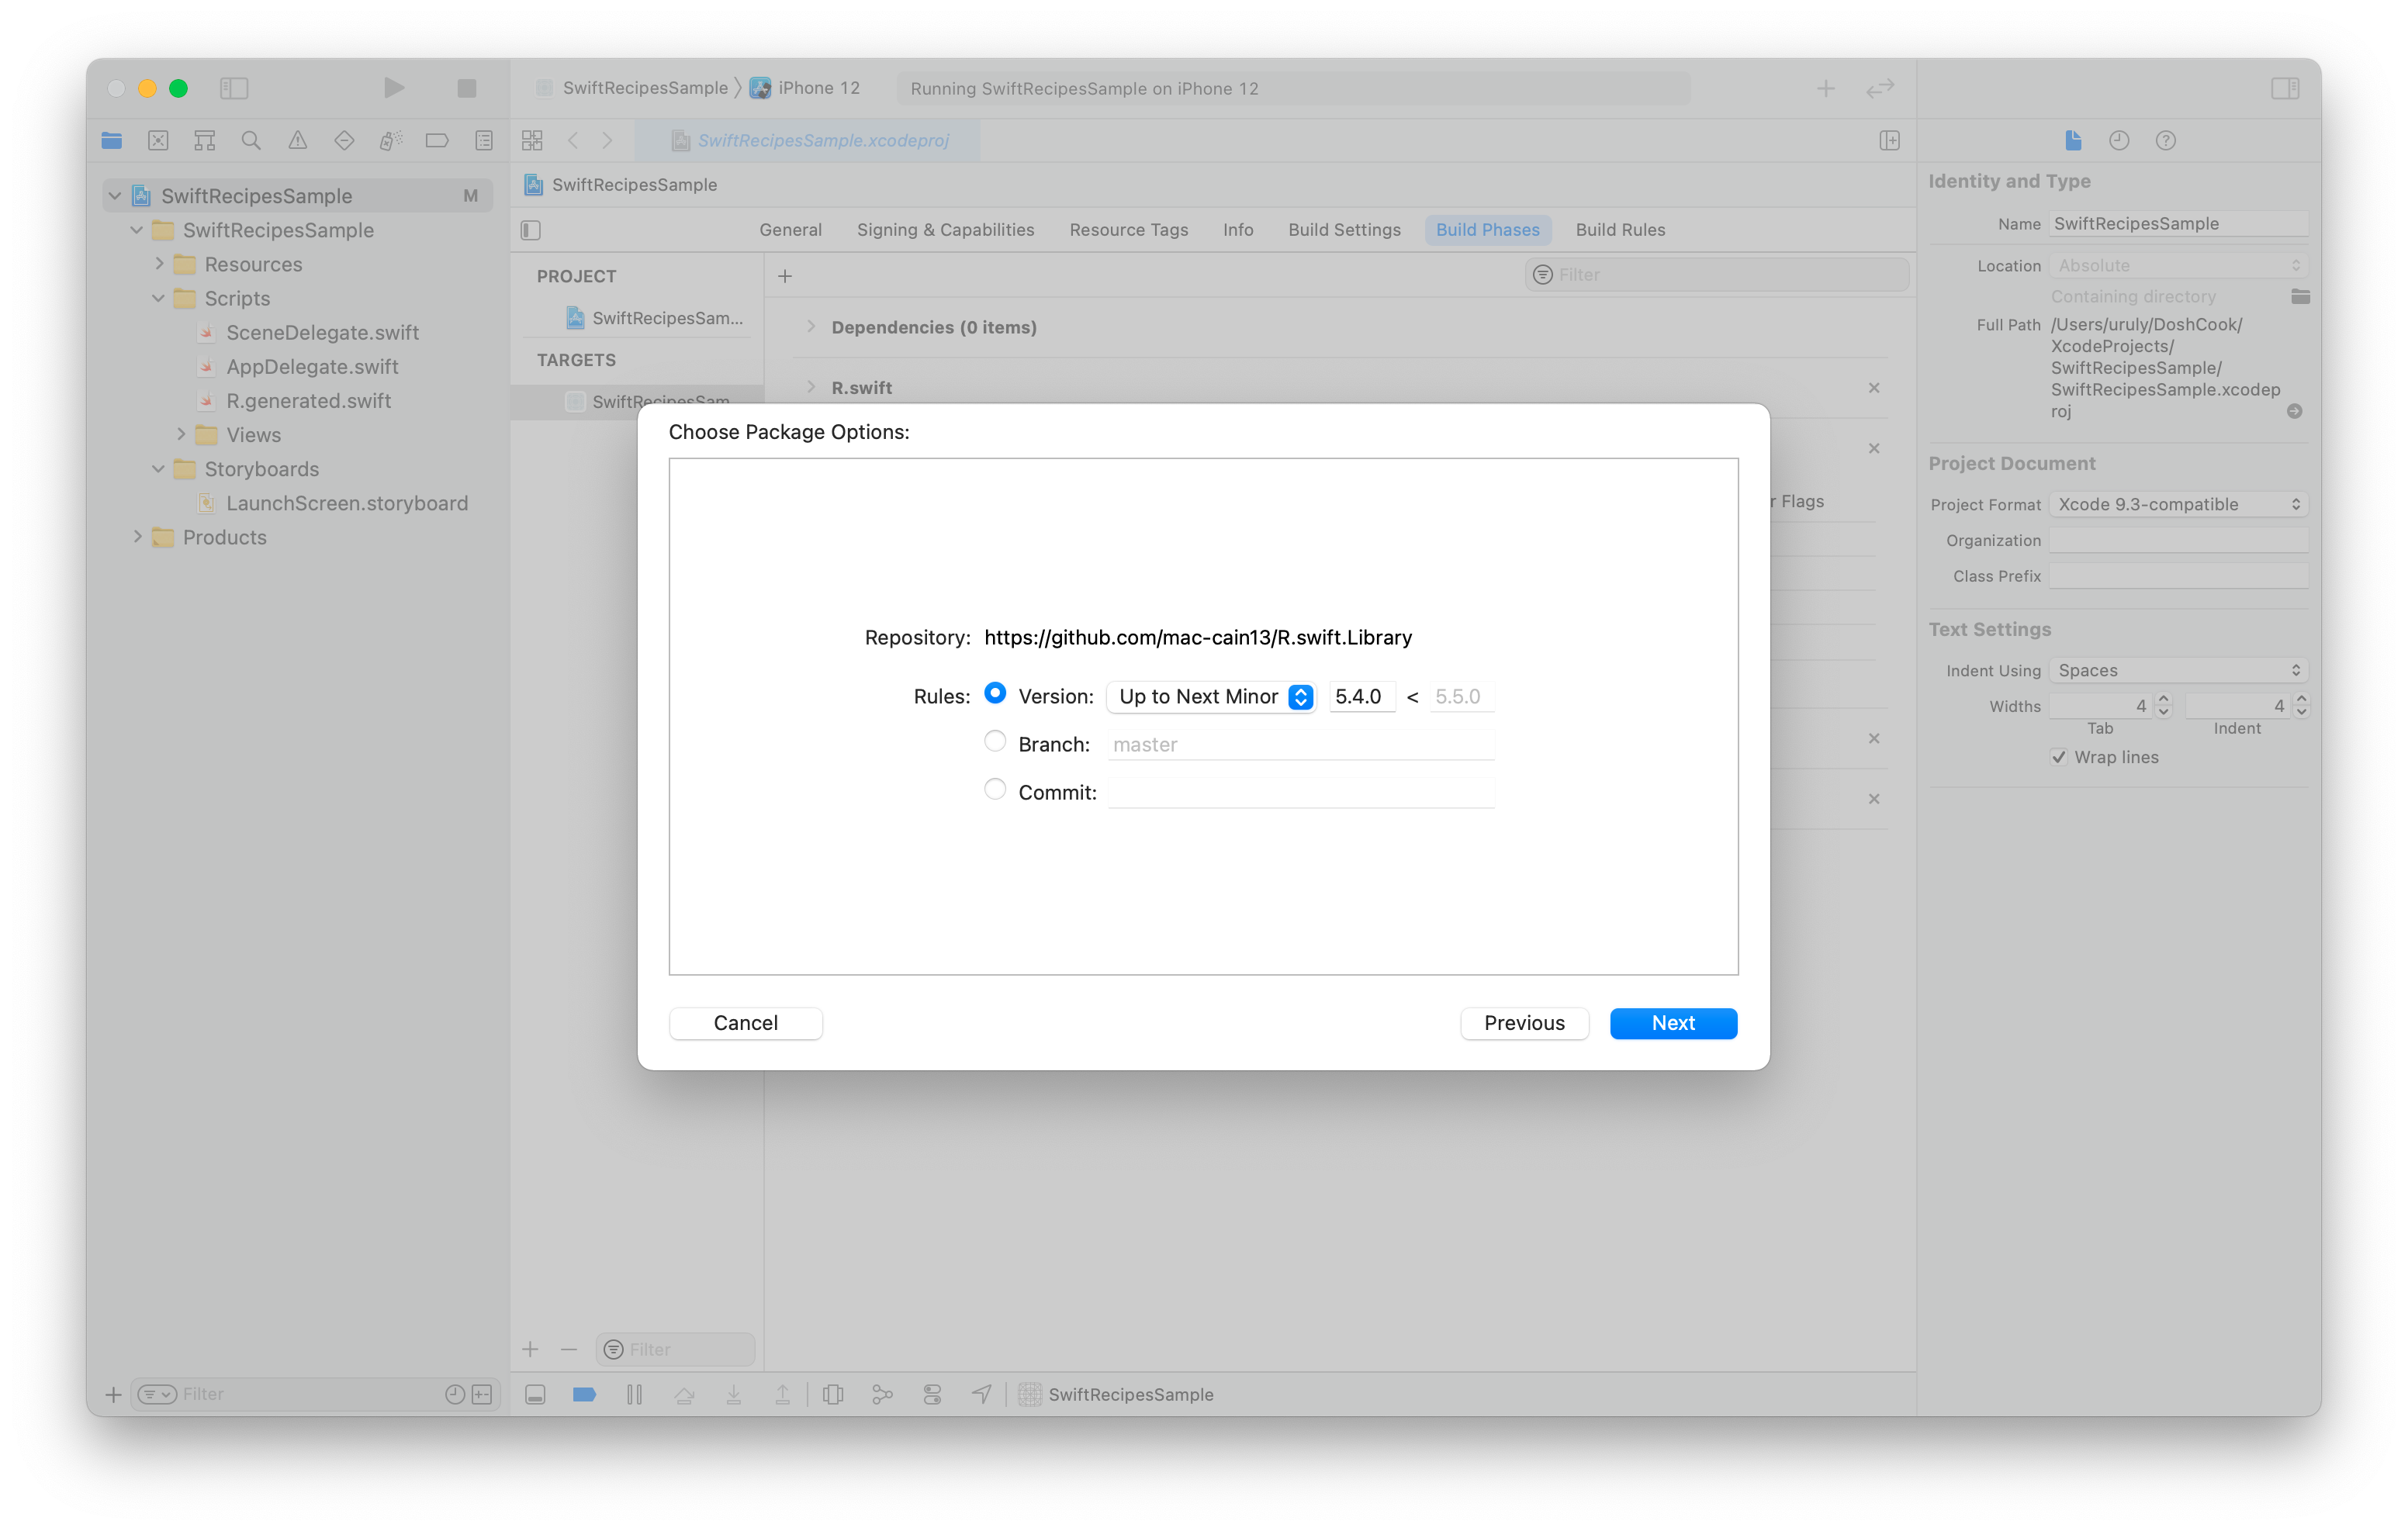
図8R.swiftのみを選択して完了します。(図9)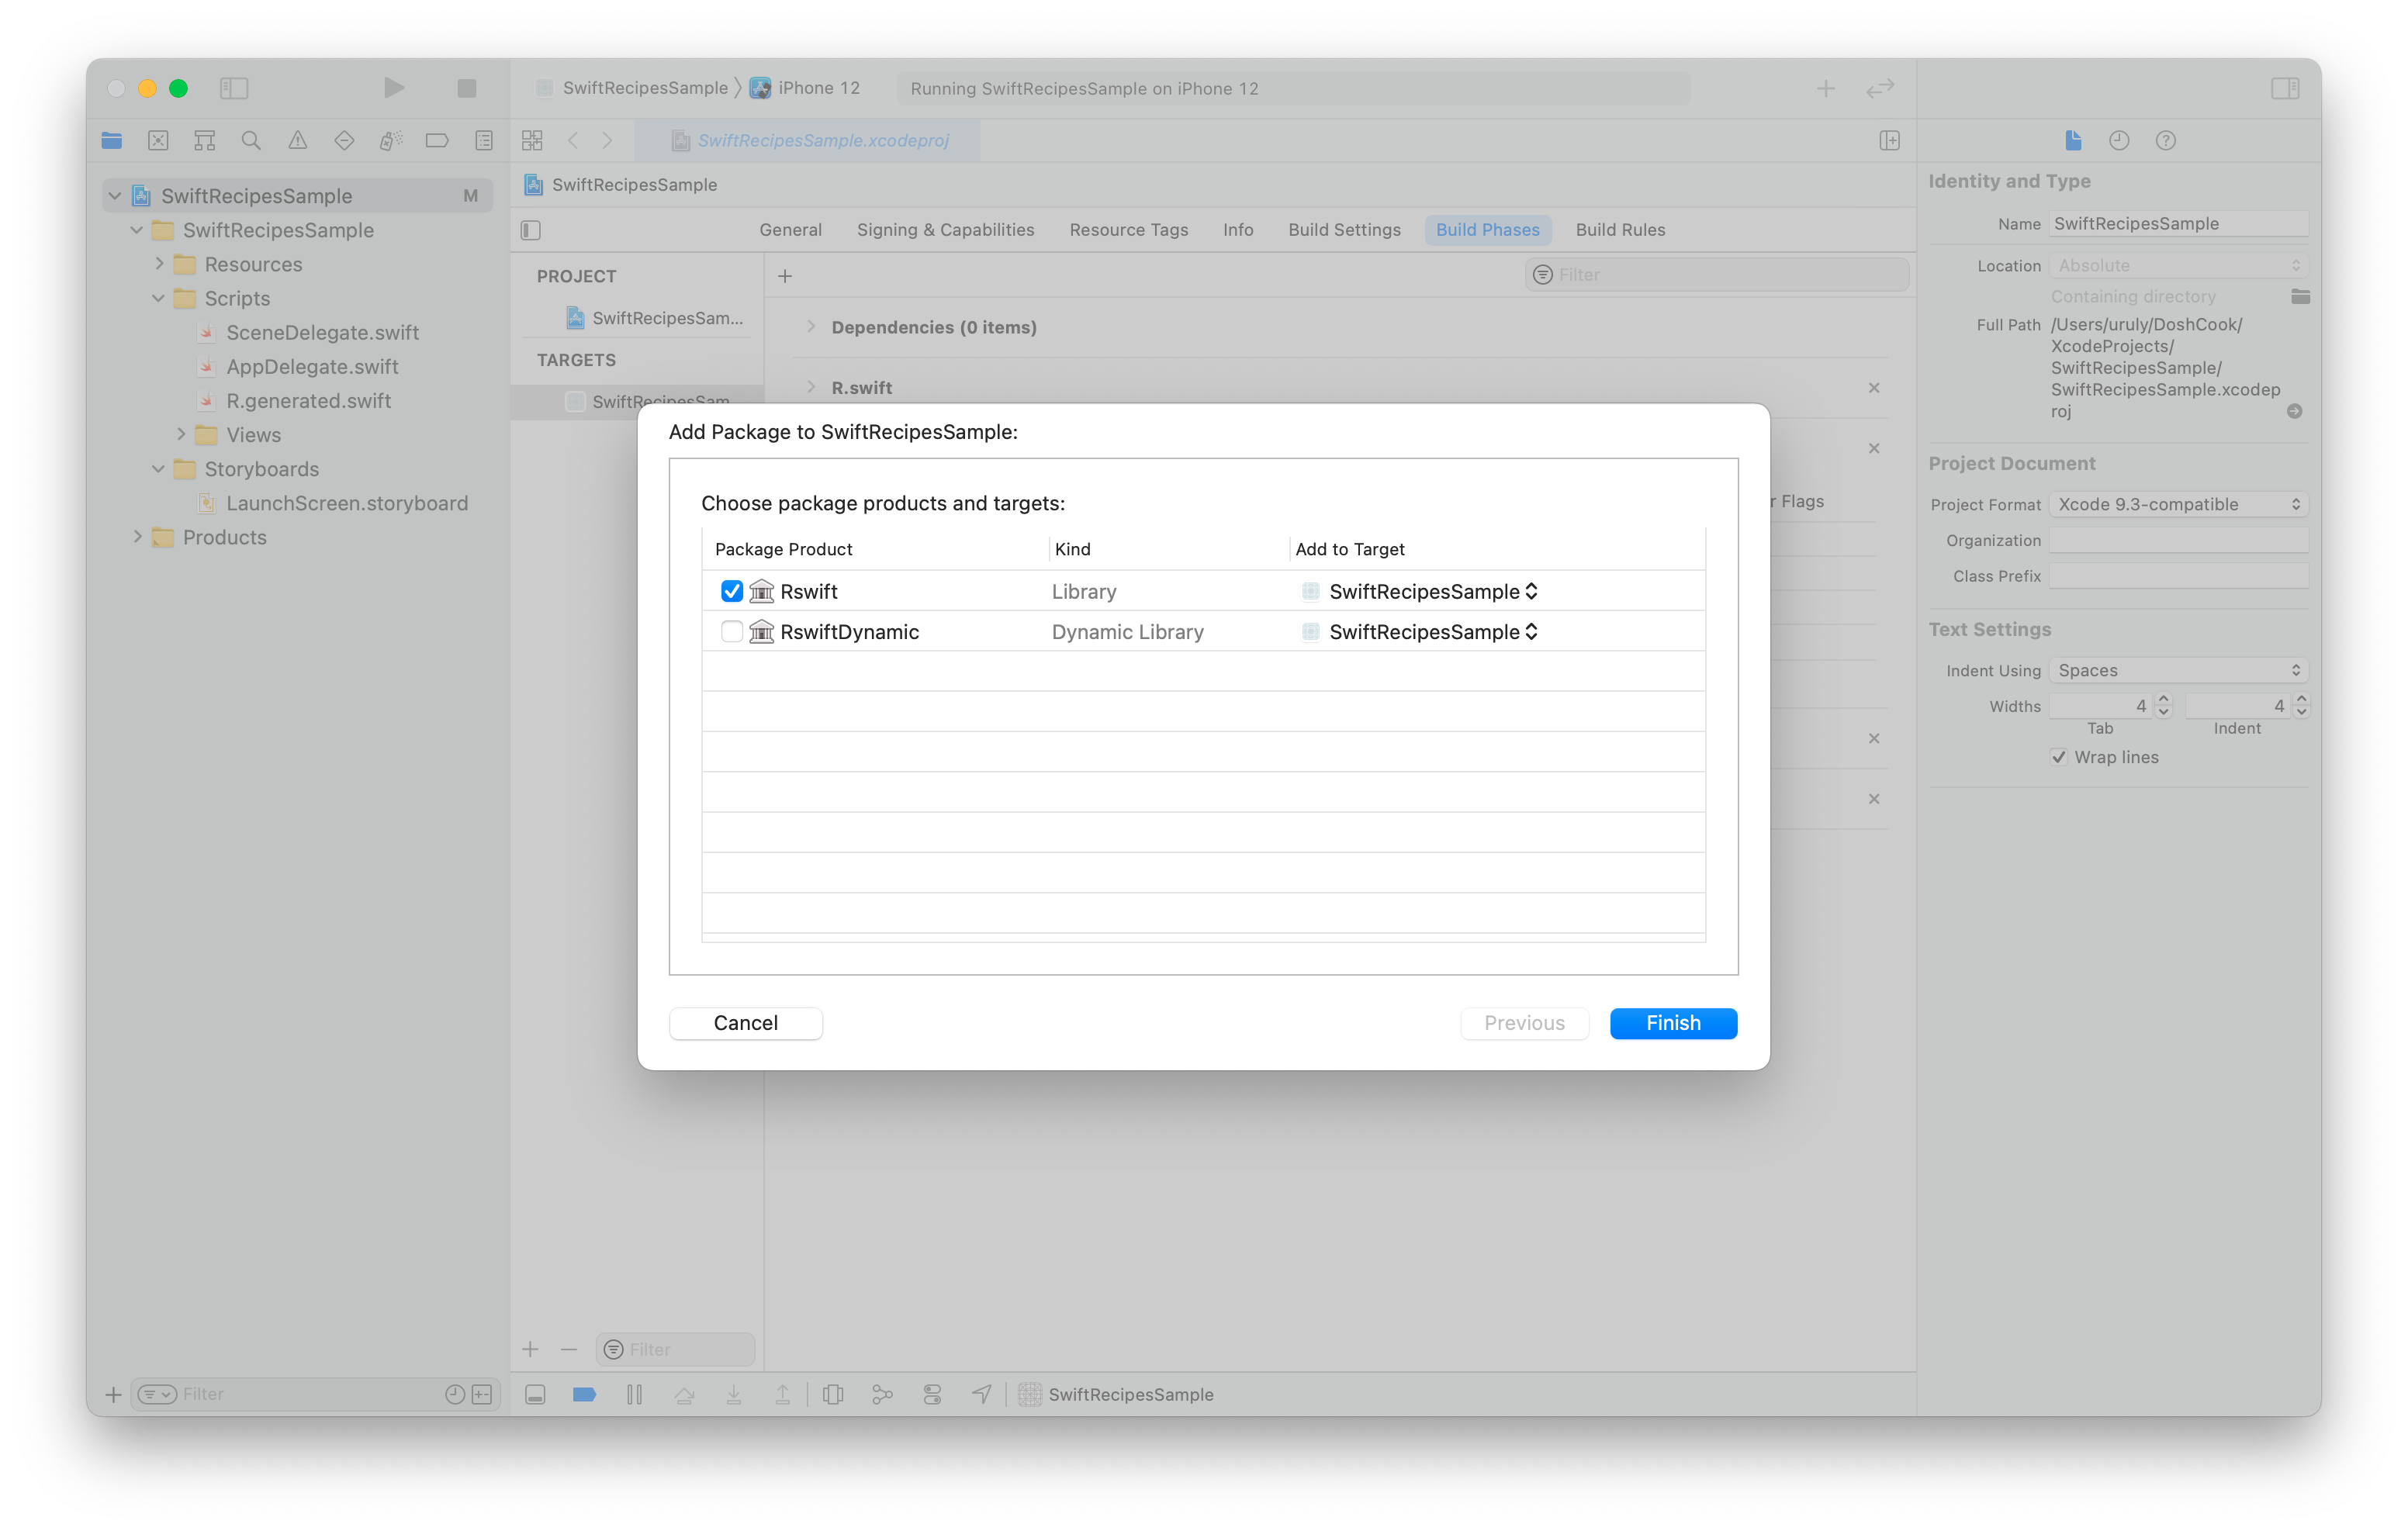
図9
これで R.swift の導入ができました。
.gitignore で R.generated.swift を無視する
R.generated.swift は自動で生成されるファイルです。このファイルは Git での管理対象から外しておきましょう。
.gitignore に追記しておきます。
R.generated.swift既に管理対象になってしまっている場合にはキャッシュを削除してリポジトリから削除します。
git rm --cached `git ls-files --full-name -i --exclude-standard`